
|
Last Christmas, my dear mother gifted me a set of mini tart tins with removable bottoms, an item on my baking wish-list!! I'm embarrased to say that it's taken me over six months to finally take them for a test drive... but better late than never! Their first use features a basic sweet-dough tart shell and one of my personal favourite fillings... pecan pie! These are somewhere in between personal sized pecan pies, or giant pecan tarts... call them what you will. But we can all call them DELICIOUS. 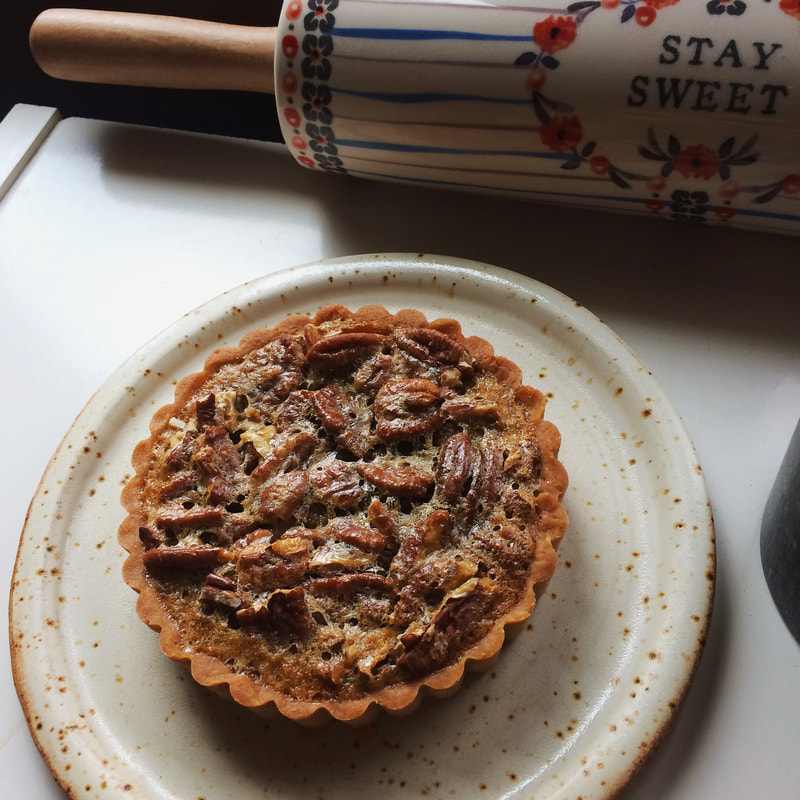 Pecan TartsRecipe adapted from my experience at The Butchart Gardens Tart Shells:
About 20-30 minutes before you want to use it, take the dough out of the fridge to thaw a little bit so that it's easier to roll. On a lightly floured surface, roll the dough out to 1/8-1/4 inch thick. Place a tart tin on the dough and use a paring knife to cut a circle of dough out that is just slightly larger than the tart tin. Place the circle of dough into the tart tin and press into the bottoms and up the sides, pressing well into the edges to form a neat wall that won't slump while baking. Dock the bottom of the tart with a fork. Repeat with remaining tins. Place the tins in the fridge or freezer and chill until firm, about 30 minutes. Preheat the oven to 375. Place a piece of parchment into the dough shells and fill with dried baking beans or pie weights to blind bake the tart shells. Bake for about 15 minutes until just starting to turn golden around the edges. Reduce the oven temperature to 350. Remove the beans and parchment. Return the shells to the oven and continue baking until lightly golden and baked through, don't worry too much as these tarts will be going back into the oven later. Let them cool before adding the pecans and filling... Pecan Tart Filling:
Preheat oven to 350F. Place the pre-baked tart shells onto a rimmed baking sheet. Fill the tart shells with toasted pecans, not too many, but just enough to cover the bottom of the shell and allow for a pecan piece in every bite. Pour the filling over the pecans to fill the tart shells. Bake for about 25 minutes until the filling has slightly souffléd and does not jiggle too much when you shake the pan. Let cool completely before enjoying :)
2 Comments
I am happy to have another addition to my muffin repertoire. I absolutely love the flavour of cornmeal in both sweet or savoury adaptations... this particular quick-bread is more on the sweet side, making it a lovely breakfast option. You can add anything you like to the batter to mix things up... in the photo below I added local saskatoon berries and fresh thyme from my backyard which gives the muffins a splendid scent. Cheddar cheese and chives add savoury notes, which makes for a nice lunch alongside a soup or salad. Any kind of frozen berries, chopped fruit, sundried tomatoes, cheese, olives etc would also be welcome additions. Use your creativity/imagination/pantry! 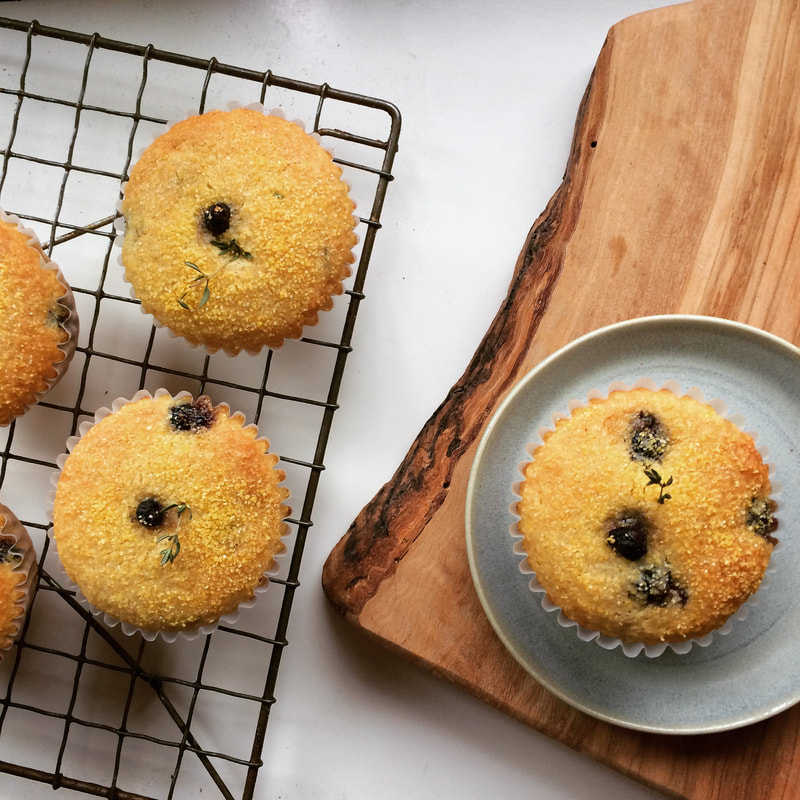 Cornmeal MuffinsRecipe adapted from my experience at The Butchart Gardens I like to measure by weight, however I have tried to also give cup measurements on the side. I cannot guarantee their accuracy, but it would be my best approximation!
In a separate bowl, whisk together the sugar, vegetable oil, eggs, buttermilk and vanilla. Mix the wet ingredients into the dry ingredients until just combined. If desired, add any fruit, herbs, cheese etc to the batter and fold in gently, being careful not to over-mix. Scoop into lined muffin tins and bake at 350 (325 convection) for about 20 minutes depending on the size of your muffin tins, until just lightly golden around the edges and the tops spring back when pressed with your finger. Let cool slightly, serve warm or at room temperature. |
Tiny Tea PartyIt's about celebrating the tiny things. Categories
All
© 2015 Larissa Costella
All Rights Reserved (All images and content are my own unless otherwise noted) |
 RSS Feed
