
|
Peach! 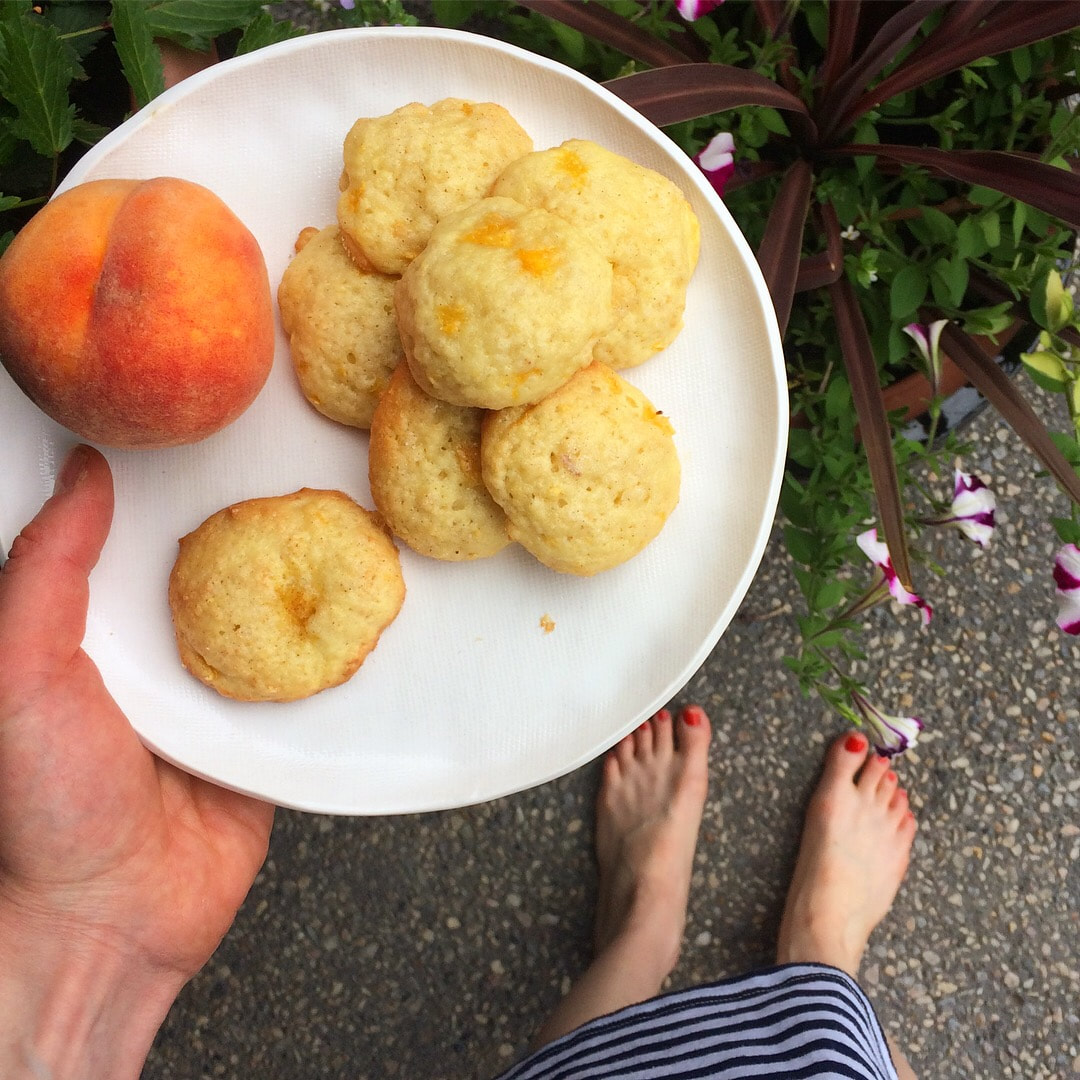 For the past couple weeks or so we have had a rotating stash of fresh BC peaches sitting on our kitchen counter, blissfully reminding us that HEY Y'ALL IT'S SUMMER!!! and we have been enjoying them every day. I love fresh peaches with yogurt in the morning, or as an afternoon snack. They are so fresh, sweet and juicy naturally that it really feels like a shame to do anything to them. UNLESS you are a cookie monster like me and you remember that you have had this recipe on the back-burner of your baking brain that you have been wanting to test run but could not because you never had both fresh peaches AND peach jam in your possession at one time... 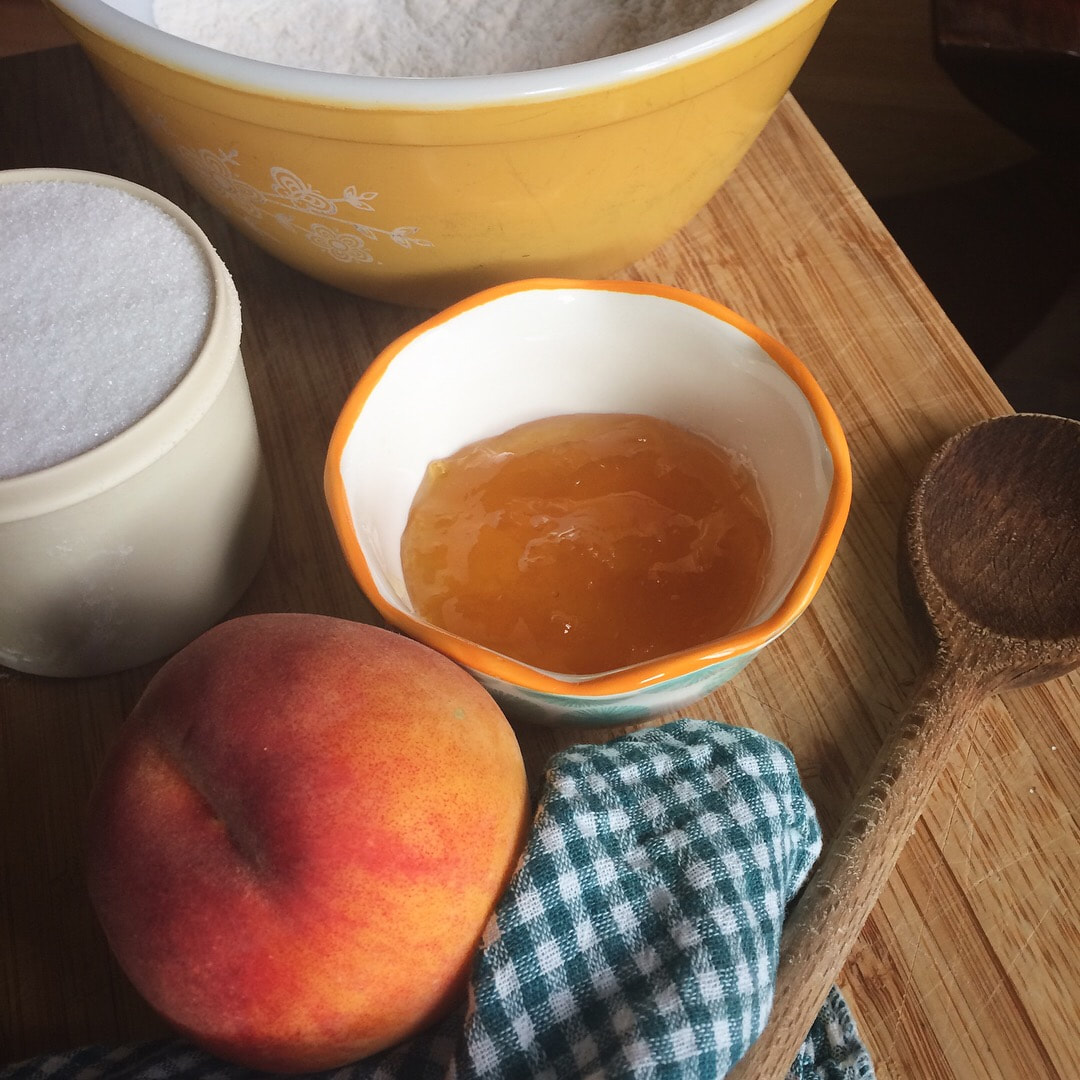 But hey! Now the stars have aligned and we have the proper resources (and time!) to make these fresh summery cookies! A great way to use up that peach jam that has been sitting in the fridge... and another way to each more peaches during these late summer days. Amen. These cookies are soft and cakey and are sprinkled with cinnamon sugar (YES!) before baking, making them all the more delightful. PS I bet these would make a smashing accompaniment to vanilla ice cream... like a fun little spin on peaches and cream. Please do try and let me know how it goes. Happy summer baking! 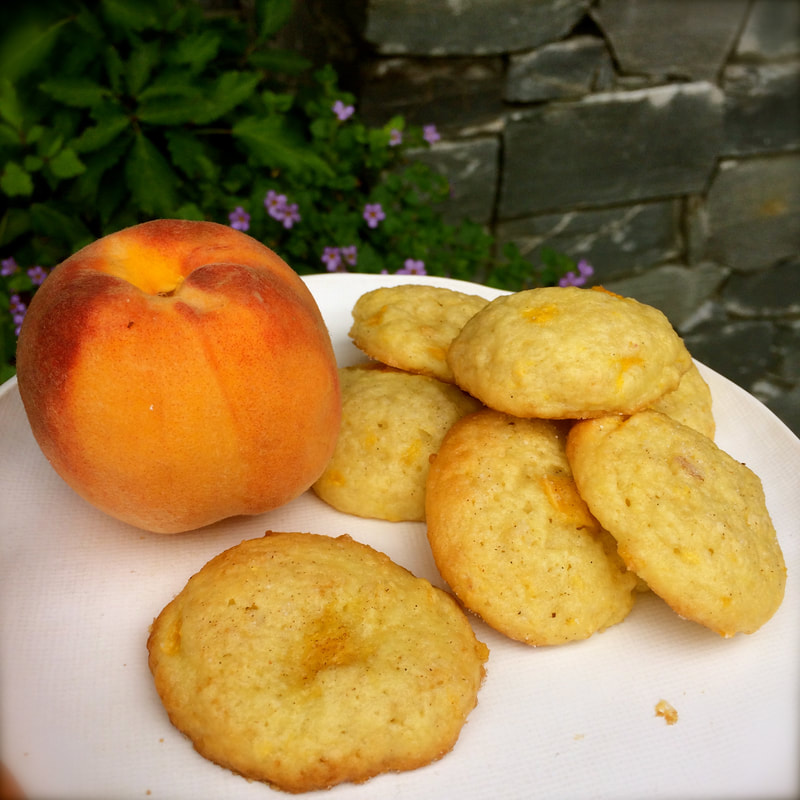 Peach CookiesRecipe from Martha Stewart
0 Comments
Let's just take a moment to appreciate the beauty of sweet potatoes. They are one of my favourite edible things in this whole wonderful world. They can be sweet OR savoury AND they are even good for you!! So if we make cookies with them... the cookies have gotta be good for you too right!? You're welcome. 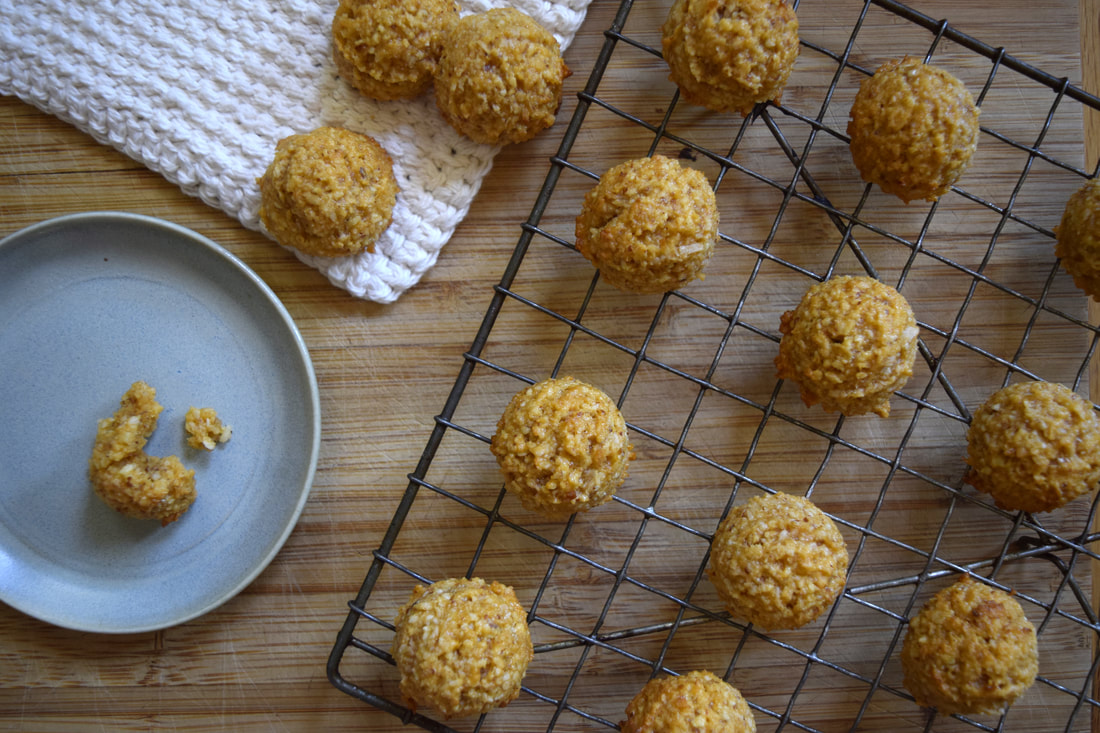 These cookies are a very recent discovery for me. They are naturally gluten free, made with sweet potato, egg whites, coconut and ground almonds... resembling the familiar coconut macaroon cookie. Dry on the outside, but soft and chewy in the centres. The most important part though, is that they are very delicious. 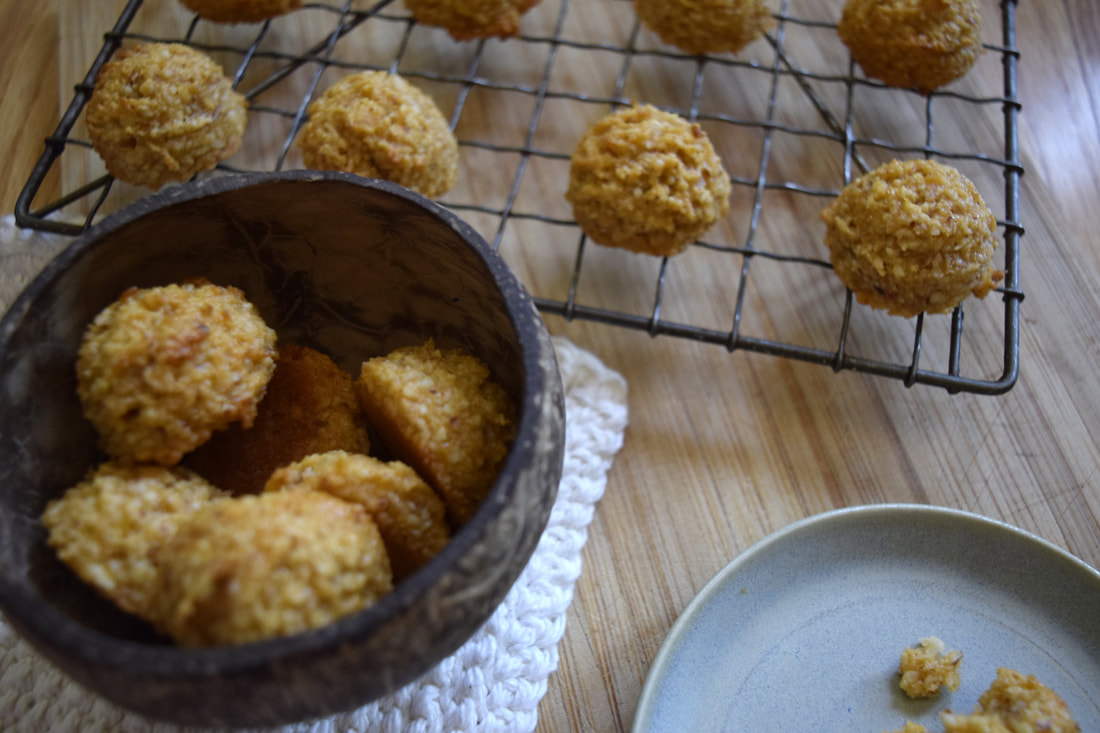 Apparently they originate from Spain... specifically speaking, they are a Catalonian cookie which is all the more thrilling as I have just returned from a trip to BARCELONA. However, I had never heard of "Pannelet" cookies until just a few days ago. The truth is, I had half a cooked sweet potato sitting in my fridge that I was just about to eat, but suddenly I had that burning desire (that I get quite often) which is "MUST BAKE COOKIES". Feeling adventurous I hit up my good friend google and found a recipe for these little mounds of orange chewiness. The recipe is from Alice Medrich, a name to which I trust all my baking qualms, so I knew it was gonna be good. I was right. Make these! Share them with the gluten intolerant people in your life! Or save them for yourself because they are just yummy regardless. 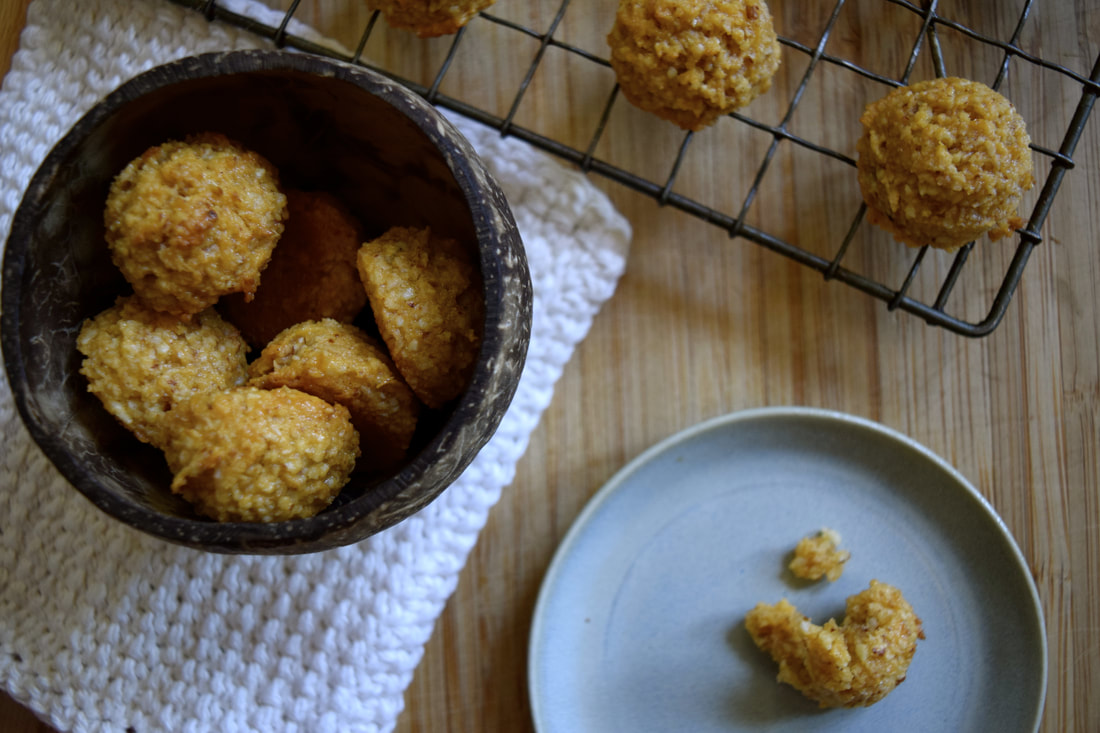 Pannelet CookiesRecipe slightly adapted from Alice Medrich see original here: ingredients:
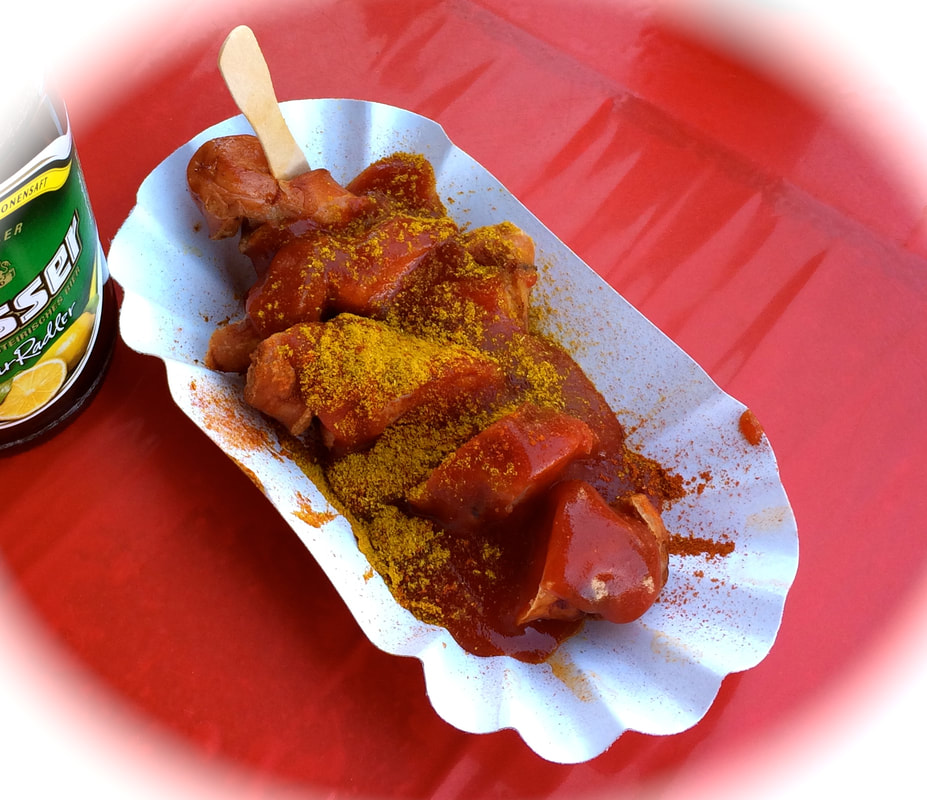 If you have ever been to the big, bold, brilliant city that is Berlin, you know about Curry Wurst! It is Berlin’s street food, and it’s everywhere. Which is great. Cuz I love it. It’s ridiculously simple though; in it’s most basic form it is just a big ol’ juicy sausage, cut into pieces and drizzled (or more often drenched) in ketchup and sprinkled with curry powder. Some places will make a special curried-ketchup sauce. Almost all places serve it in a little white paper vessel along with a 2-prong wooden fork, designed for eating it right there, standing on the sidewalk. It’s not fancy, but its DARN TASTY. 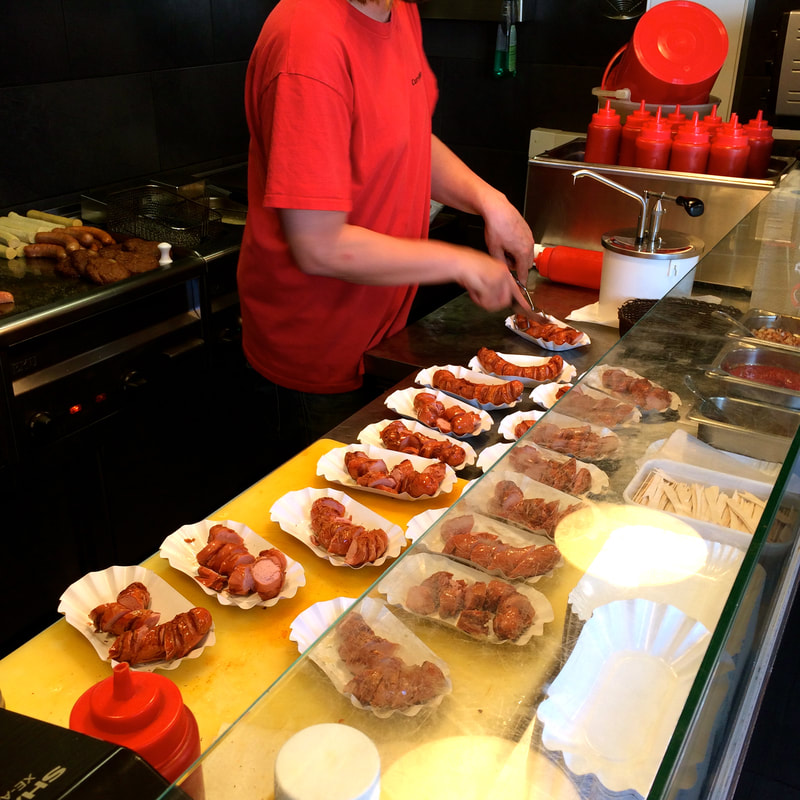 I have been lucky enough to get to visit Berlin TWICE thus far in my life and you bet on my second time round I was stoked to get another curry wurst experience. It was everything I hoped for and more. I must say eating street food in a city where it is also legal to drink in public makes things all the more fun.  During my free-time-wanders I stumbled upon none other than the Curry Wurst Museum. Yes, Berlin has a museum dedicated to their infamous street food. I had to check this out. Although I did not have the time to pay to go into the museum, I did enjoy wandering through the gift shop. There I found such wonders as ceramic versions of the paper plates they are served on, and even stuffed-crochet curry wurst sculptures... along with Curry Wurst t-shirts, magnets, keychains, and all the usual gift shop paraphernalia. I also managed to obtain a recipe for a Curry Wurst sauce! SCORE. I knew that this was something I must create in my own kitchen back home. Danke! 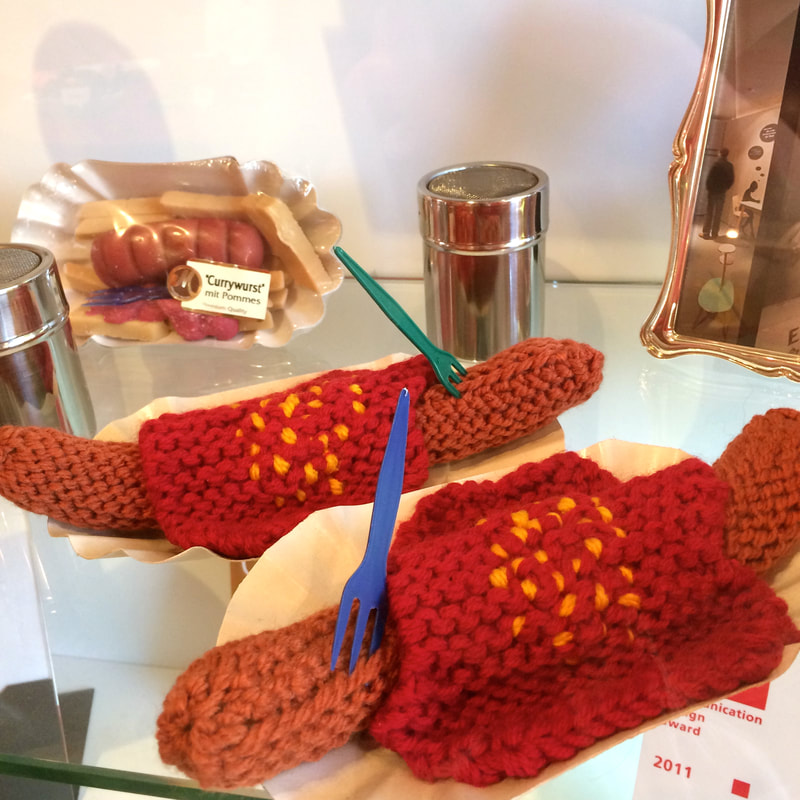 I’m sure there is a specific type of sausage that you are supposed to use for making Curry Wurst, however I am not really sure what it is. I think whatever you like to eat and whatever you have on hand will suit just fine. You could slice it up and eat it as is, standing in your kitchen, street food style. You could maybe make some french fries to go with it on the side ya? Or put it in a bun like a fancy Berlin style hot dog. Follow your heart. But don’t forget the extra sprinkle of curry powder dusted over top before you serve it. That part is essential ;) 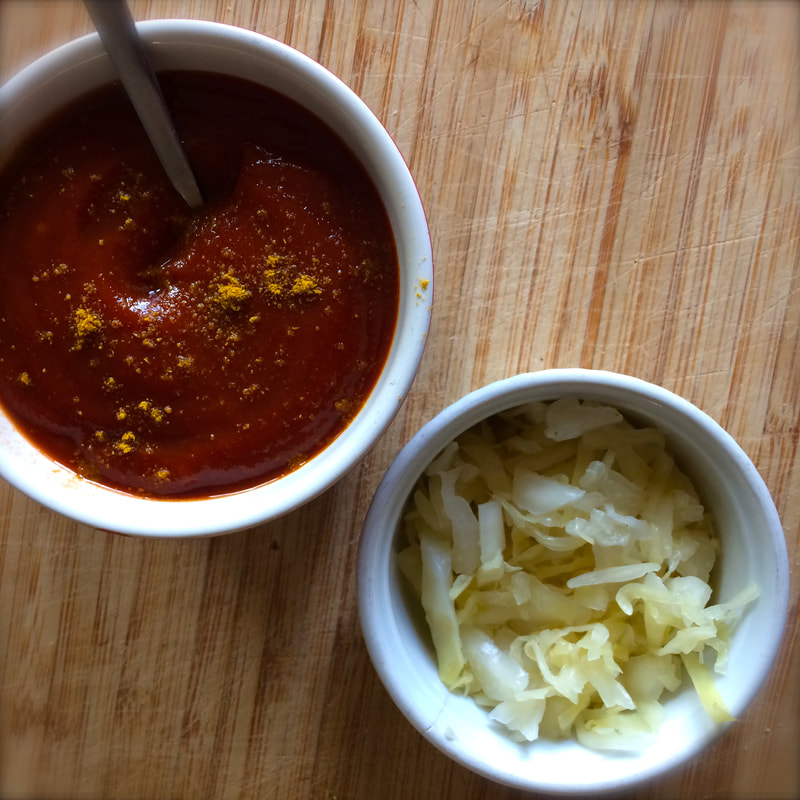 My homemade curried ketchup, pictured here with my first ever batch of homemade sauerkraut! Very German, ja? CurryWurst KetchupRecipe sourced from the Curry Wurst Museum in Berlin, Germany ingredients
directions Heat the water in a pan. Add sugar, curry powder, paprika, salt, Sambal Oelek and tomato paste. Bring to a boil, stirring frequently. Remove the pan from the heat, stir in vinegar and ketchup. Bring to a boil once more. Let cool before serving. Cook up some sausages, on the grill or stove however you like, and serve with the curried ketchup. Sprinkle with an extra dusting of curry powder over top. YUM The following is inspired by a recent and rather fabulous trip to ITALY where I met up with my dear mother and father. Here is a small tale of our travels, and of course, a recipe to follow.
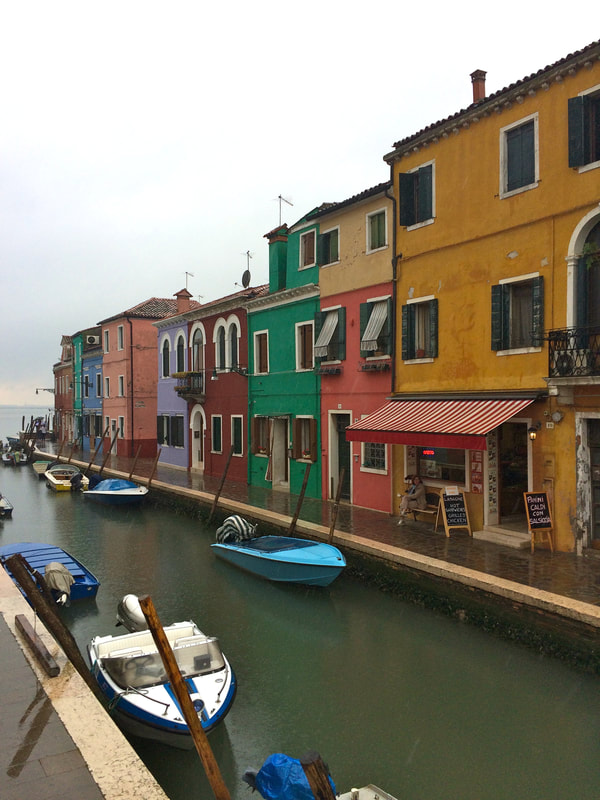
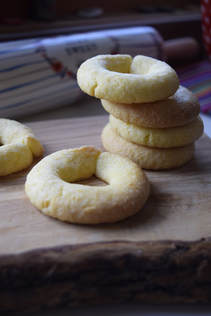
Once thing I love about Italy is how food is so regional, and specific ingredients, dishes, and recipes come from very specific parts of the country. This also includes COOKIES. I discovered that almost every city and even small towns, had a signature cookie! As a self-proclaimed Traveling Cookie Monster, this is very exciting news to hear. I was a very happy gal after I visited the ever so charming island of Burano, and then discovered about it’s very own signature cookie, the Buranello! Tell me more!  Other than Buranello cookies, Burano is mostly known for two things: colourful buildings, and lace. This makes it a very aesthetically pleasing and photographic little island to visit. It is difficult NOT to take a photo of each and every street, from all angles, multiple times. We had read about this island from a newspaper article, the houses so bright and vibrant against the sunny blue skies pictured in the article’s photos. 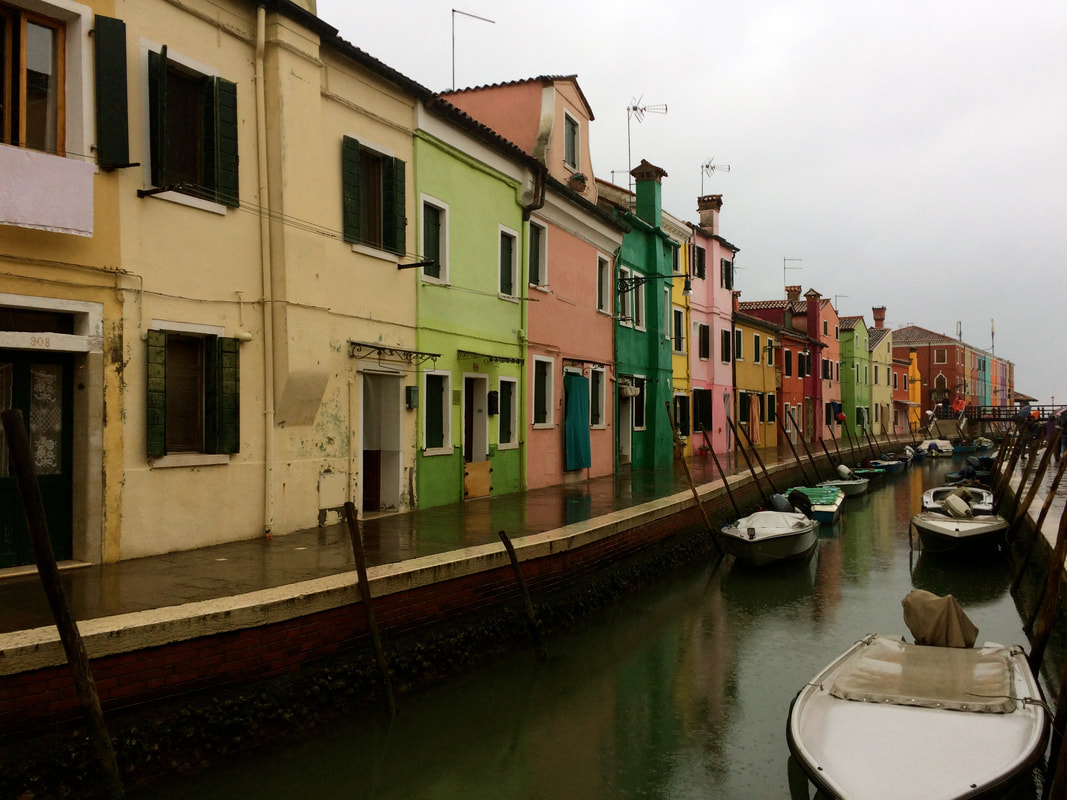 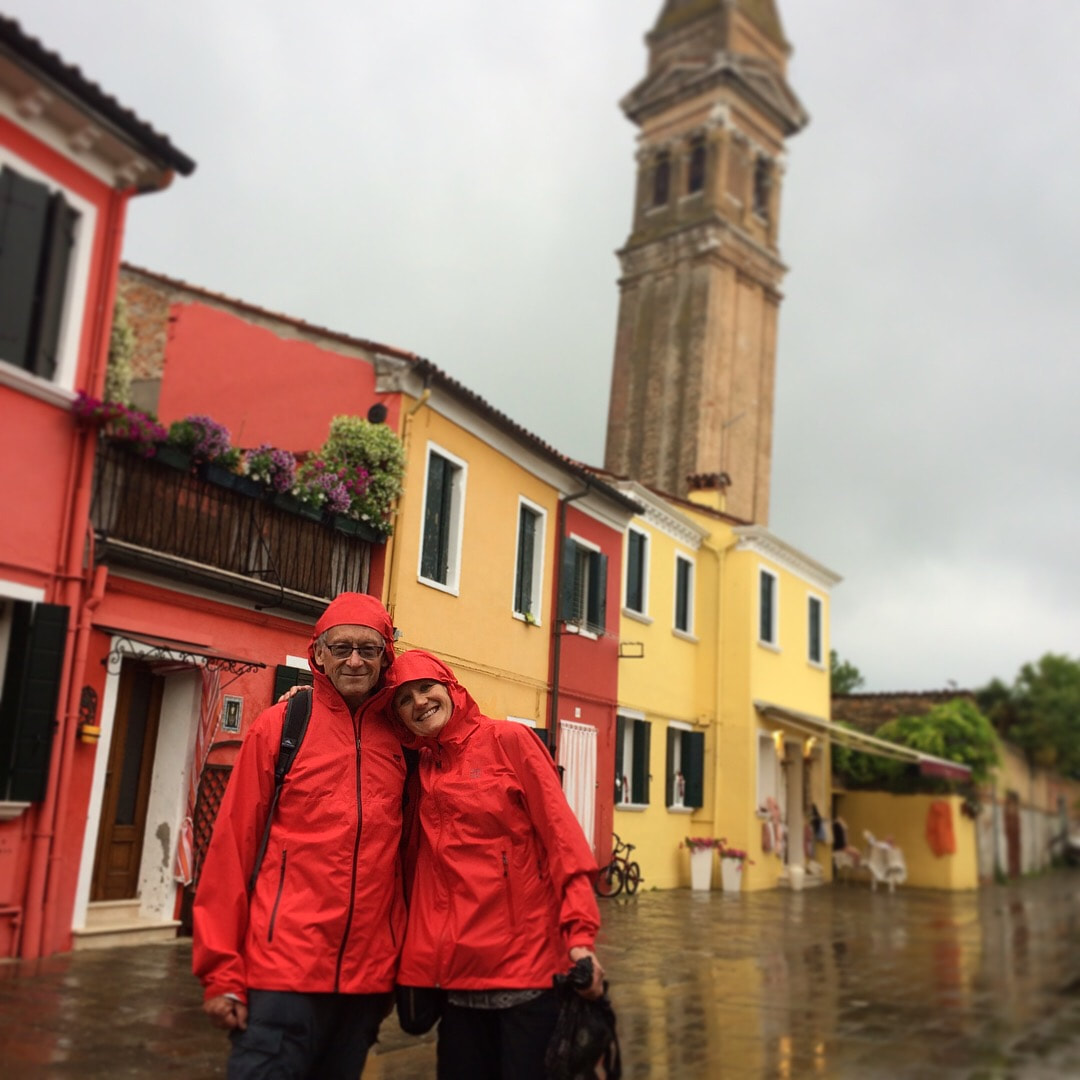 Unfortunately for us, our chosen day to visit this charming island had correctly forecasted RAIN. But that was not about to stop us! We donned our raincoats, hoods up, (mom and dad had matching ones which just added to the cuteness) and boarded a boat to Burano. Due to the less than desirable weather conditions, our photos were not quite like the ones from the newspaper article... However, we still found the little island to be incredibly magical and it was definitely a highlight of our Italy experience! I still like the photos we managed to capture of rainy-day-Burano. (It also probably helped to minimize the dreaded crowds of other tourists) 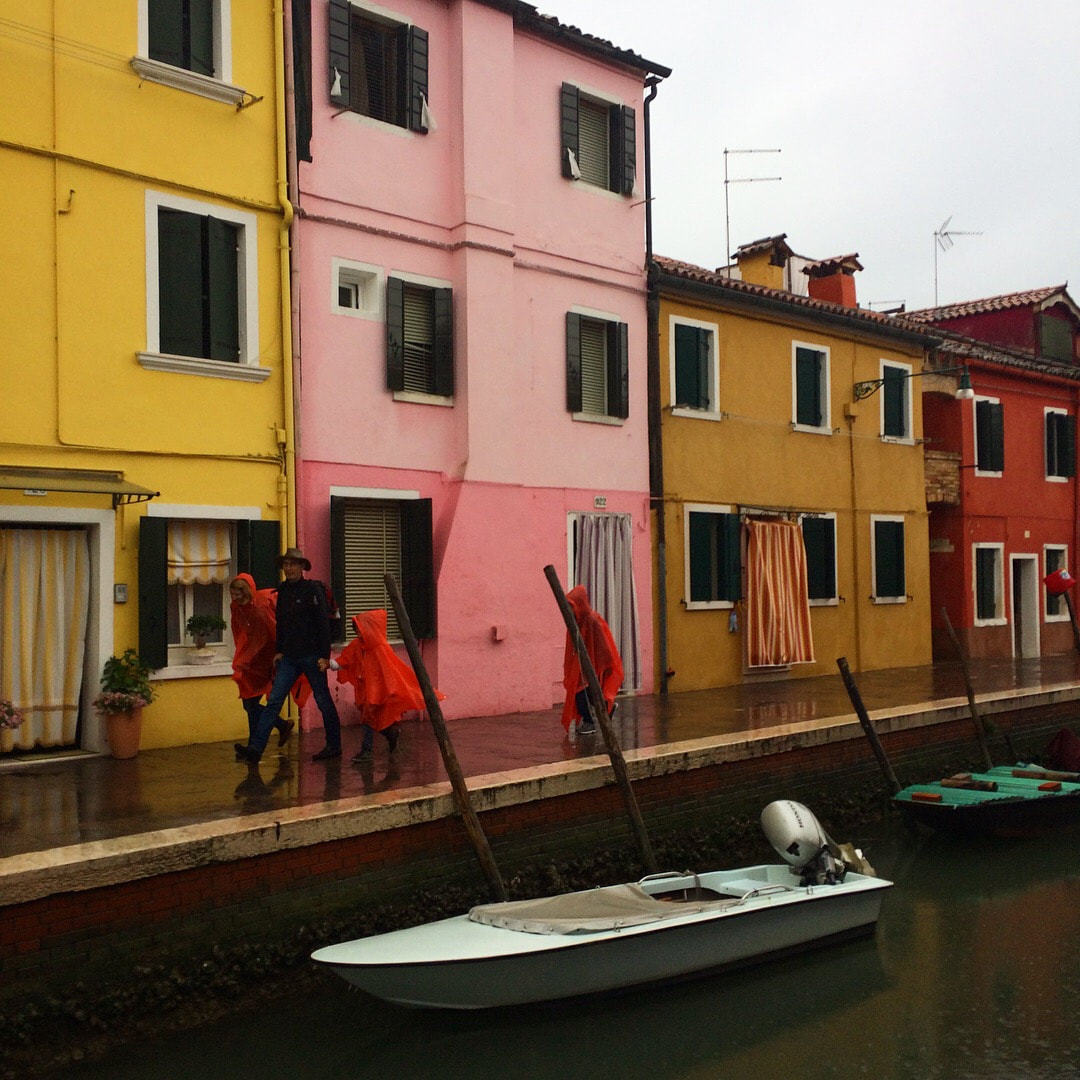 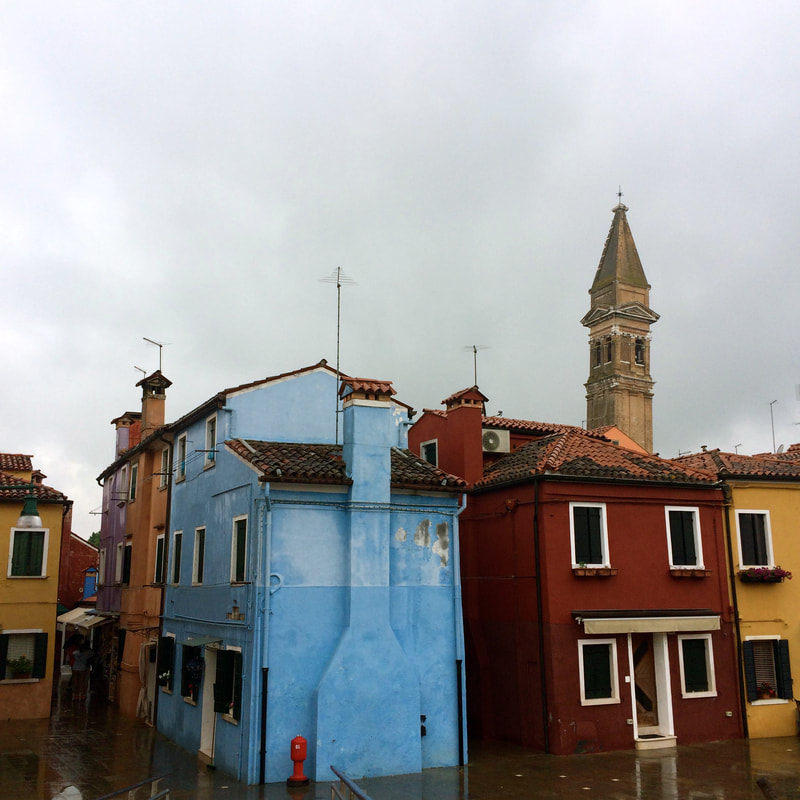 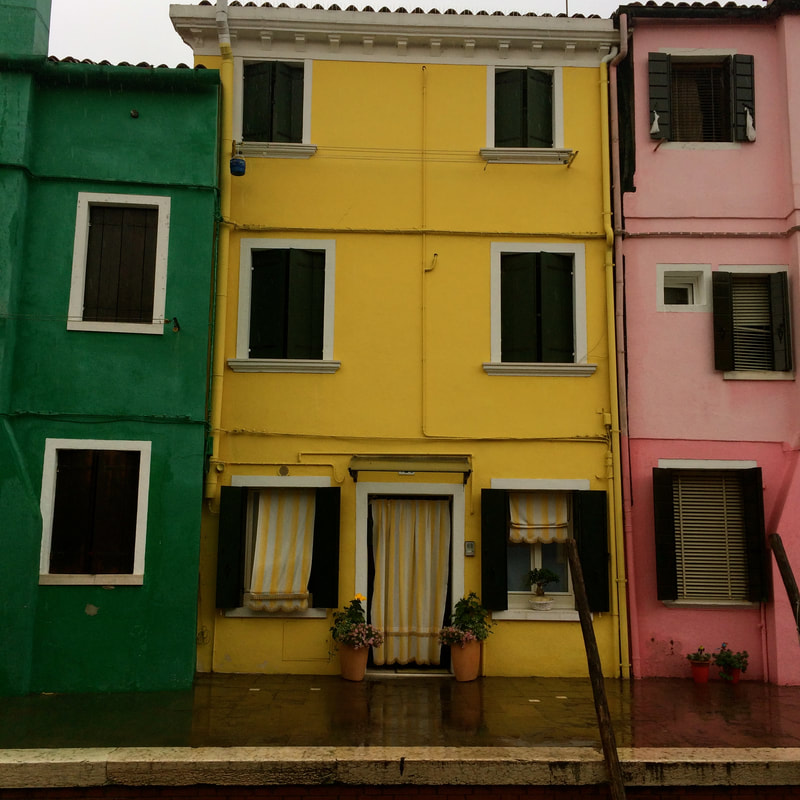 I love all these cute little houses! What a dreamy place :) Later, back on the boot-shaped main island of Venice, I read in a cookbook about Buranello cookies, and how they hailed from the region of Burano. Hey I was just there! And even later that evening, I had a chance to sample one! Cookie dreams coming true!!! HAPPY DAYS. 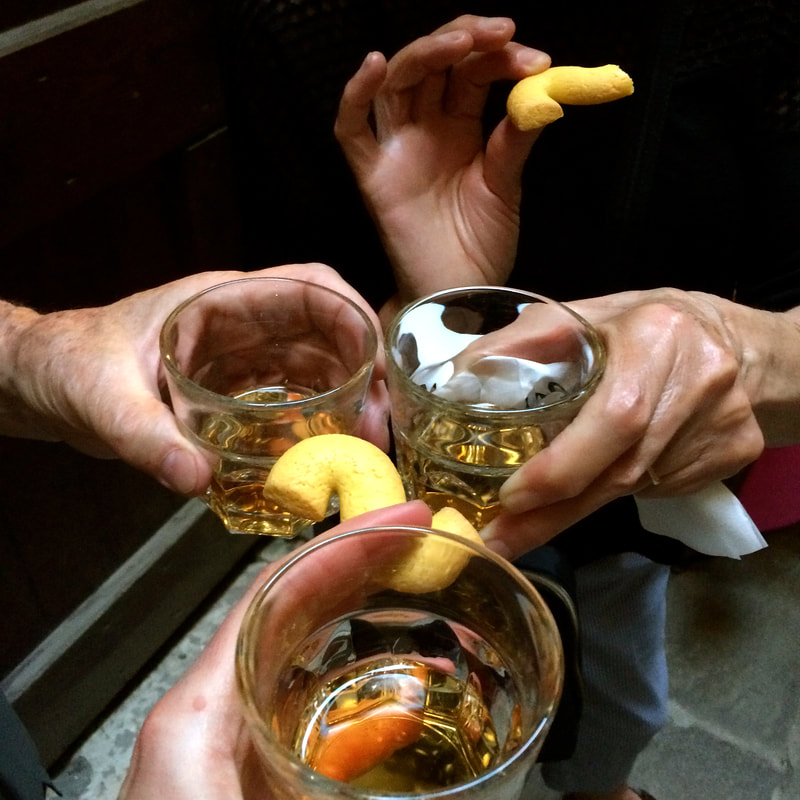 There are two varieties of Buranello cookies: Bussola and Essie. Bussola are traditionally formed into O shapes, by rolling out a log and connecting the two ends. Essie are formed from the log into S shapes - easy to remember by the name. 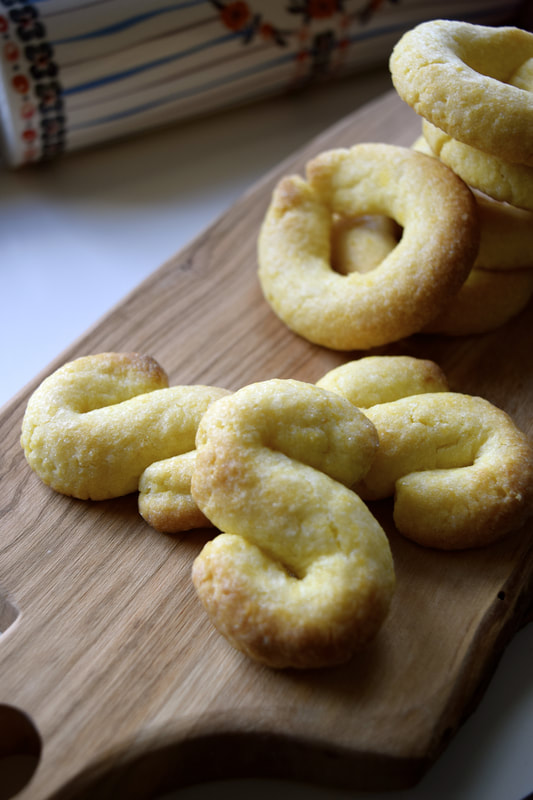 You can see these little treats EVERYWHERE in Venice, most often commercially produced and packaged into large bags. Both are made from the same dough recipe (as far as I am aware), and both are meant to be served with a sweet dessert wine after a lovely Italian meal. They are meant to be somewhat firm and dry, so that you dip them into the wine and enjoy the two together. They are a simple and humble cookie, and for that, I am a fan. Also, anything that I am encouraged to dunk into wine sounds like a great idea to me. 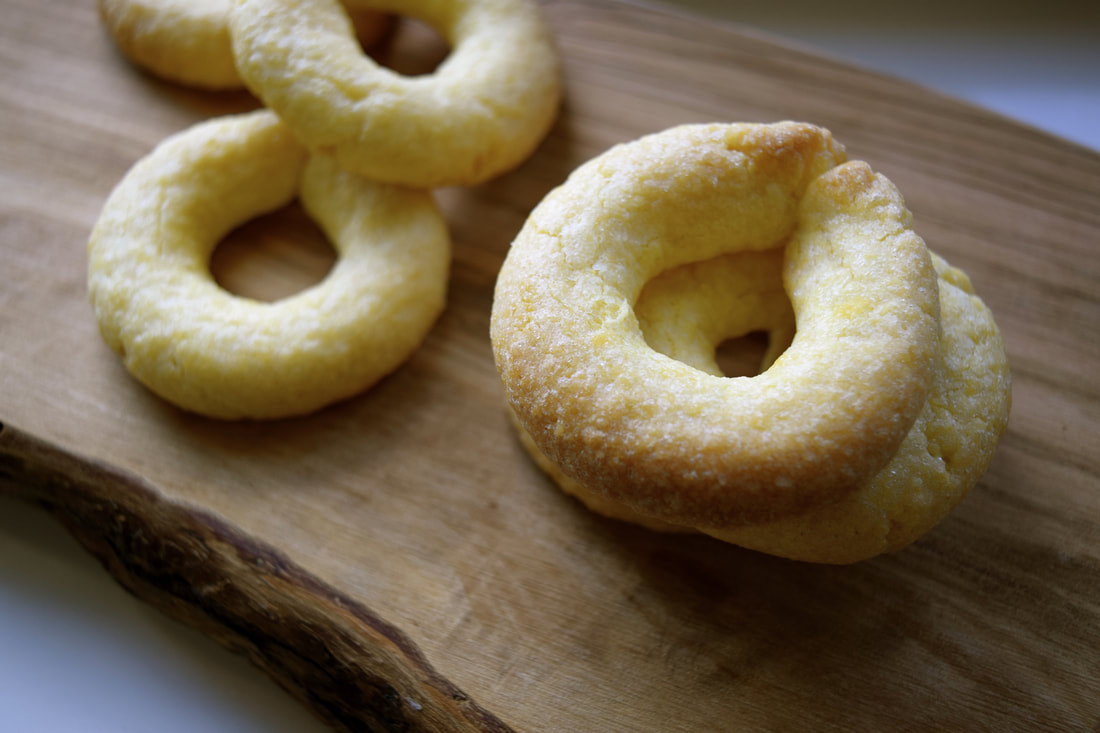 Buranello Cookiesrecipe from "Venice and Food" by Sally Spector *note: the original recipe gave weight measurements in ounces only. While these measurements will provide the most accurate results, I have done my best calculations to give approximate metric and volume conversions to accommodate all kitchens and bakers. ingredients
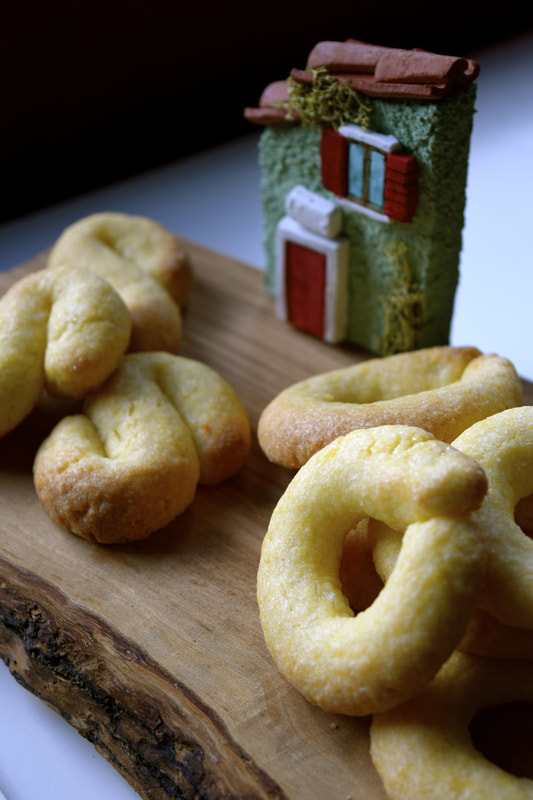 my homemade buranello cookies, alongside a tiny souvenir I picked up, to help me remember Burano in all its cute and colourful glory :) Sugar, spice and everything nice that is best enjoyed with a cup of afternoon tea. According to the internet, Moravia is a very old region of the Czech Republic, that no longer technically exists but is still commonly referred to as an area of land to which people identify themselves with. I don’t know anything about Moravian people, but I do know that they must have good taste in cookies. AND fun fact, in just a little over two weeks, I will actually BE in the Czech Republic! So all the more reason to celebrate with cookies. 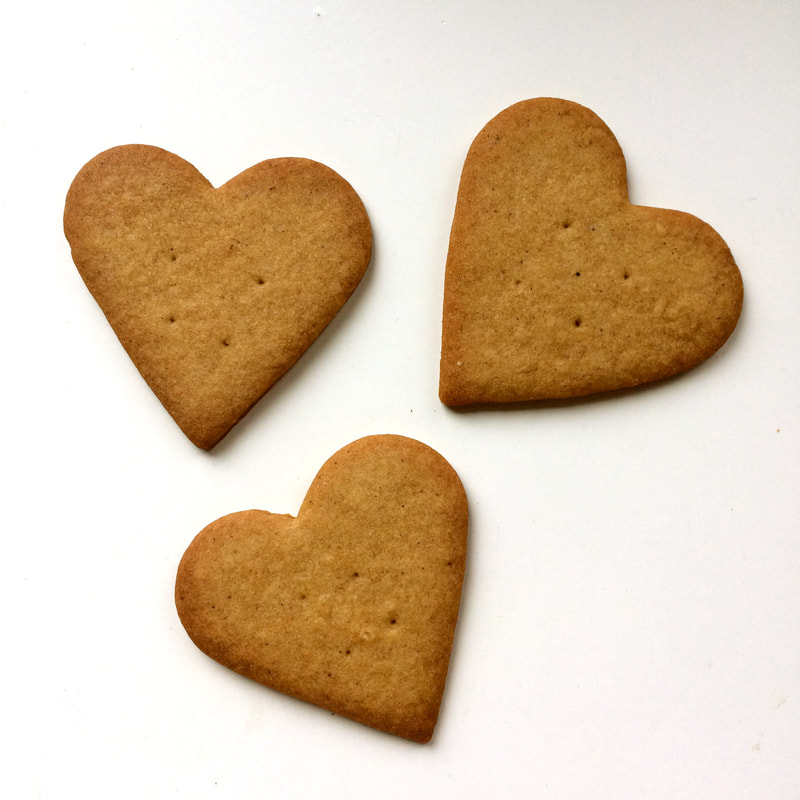 These little treats are thin and crisp with a blend of the warmest spices that make them reminiscent of those lovely little Speculoos/Speculaas or Biscoff cookies that are highly sought after WORLD WIDE and now often served on airplanes!! I feel like I’ve won the lottery when the snack trolley offers me one of those little gems. Maybe I will get a spiced cookie on my plane ride who knows... But for now I can bake something similar at home. They’re not an exact replica of the Lotus Brand biscuits, but they are darn tasty cookies. The best part is that these work excellent as “ice-box” cookies, meaning you can slice and bake from frozen as you need them. Keep the dough in your freezer, and you are always prepared for afternoon tea emergencies. Thanks, Moravia! 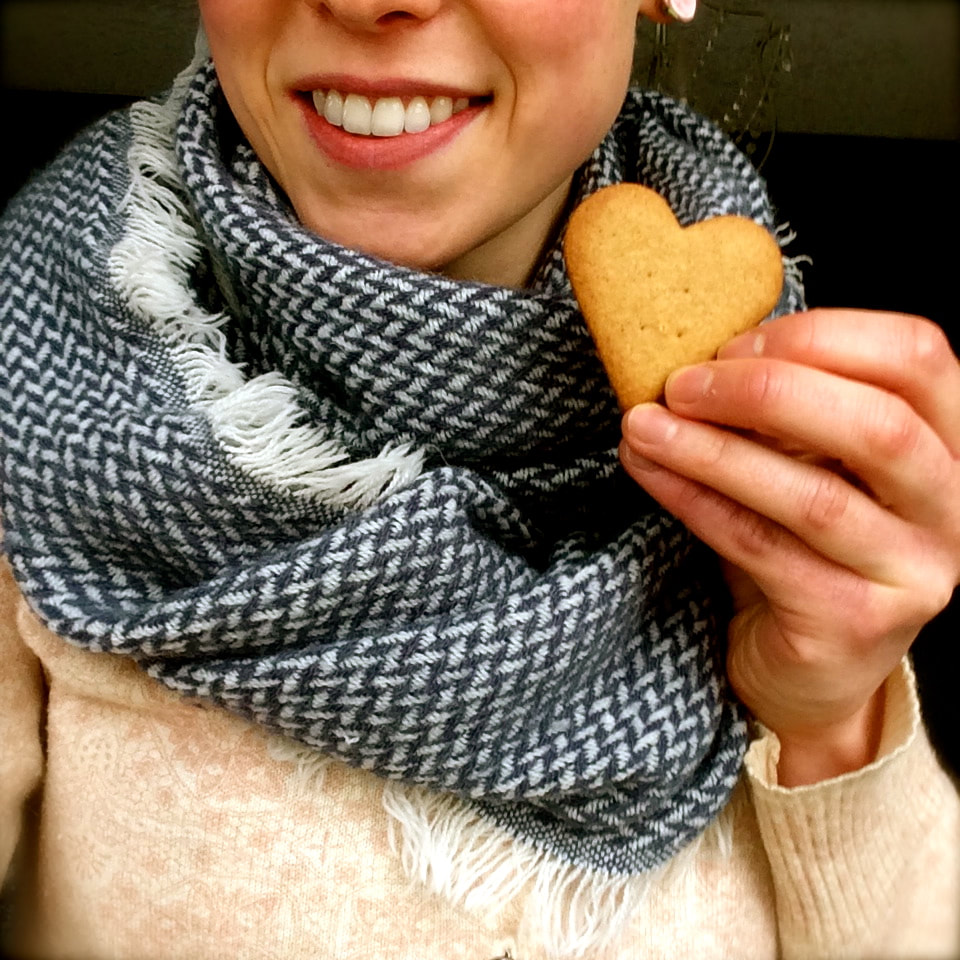 Moravian Spice CookiesRecipe from good ol' Martha Stewart
 I've always wanted to take a cake decorating course. This is NEXT LEVEL! 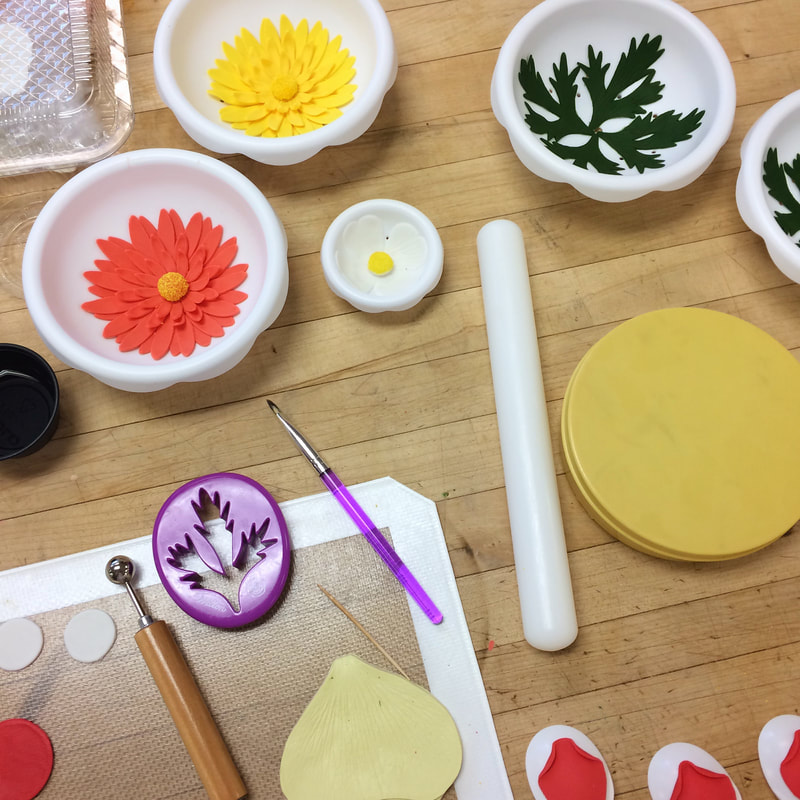 I'm in Week 1/3 of the "Wedding Cake Class" at baking school, and it's pretty magical. I must admit that I am enjoying it more than I expected I might. I kind of used to think that gum paste flowers were (dare I say) a waste of time, and were cliche, traditional, dated... I obviously didn't know what the heck I was thinking. I suppose they could be all of those things, but now I have been exposed to a whole other world of magic and artistry! My cake decorating eyes have been re-opened! A creative flame in my brain has been ignited! I literally have been having a hard time sleeping this week because I am so excited and inspired and can't stop thinking about whimsical, artful cakes. This all sounds incredibly dramatic but alas it is my reality. Somebody please take my pinterest away. 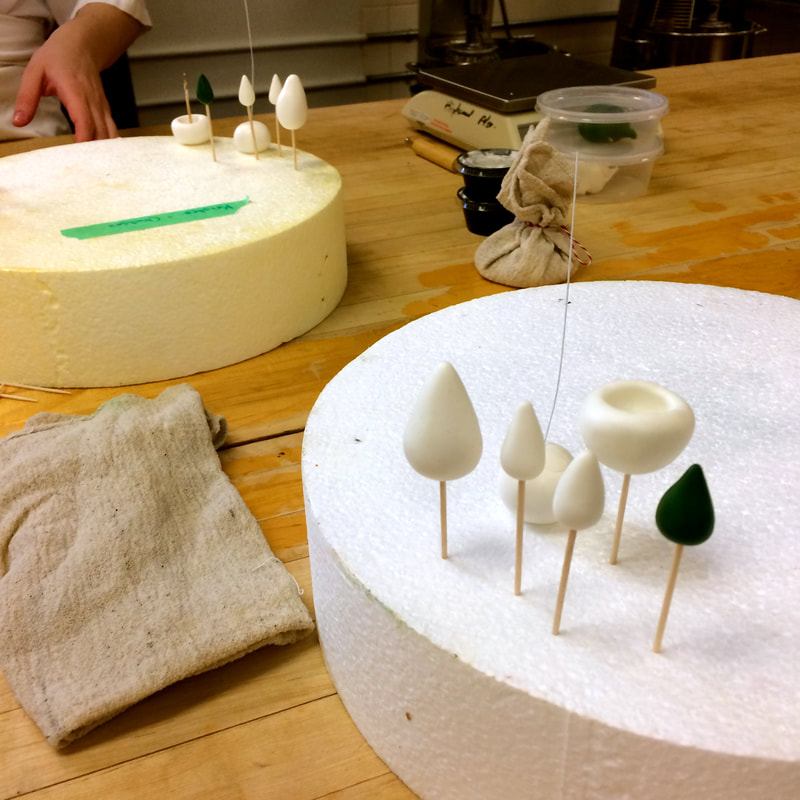 This first week we have been learning all about how to make edible flowers out of gum paste. I have learned a GREAT DEAL. This is most likely because previous to this week I knew next to nothing about this topic. I do not even recall ever touching gum paste before this class. And now I am making botanically correct replicas of flowers with the stuff. Or at least attempting to. Such a fine way to spend the afternoon. Below you can see me in the process of building a ranunculus flower, which is both as fun and tricky to build as it is to say. I therefore dubbed it the Ridiculous Ranunculus. Is this a culinary class? Or a botany class? Or a sculpture class? It appears to be all three, smooshed into one. AWESOME. 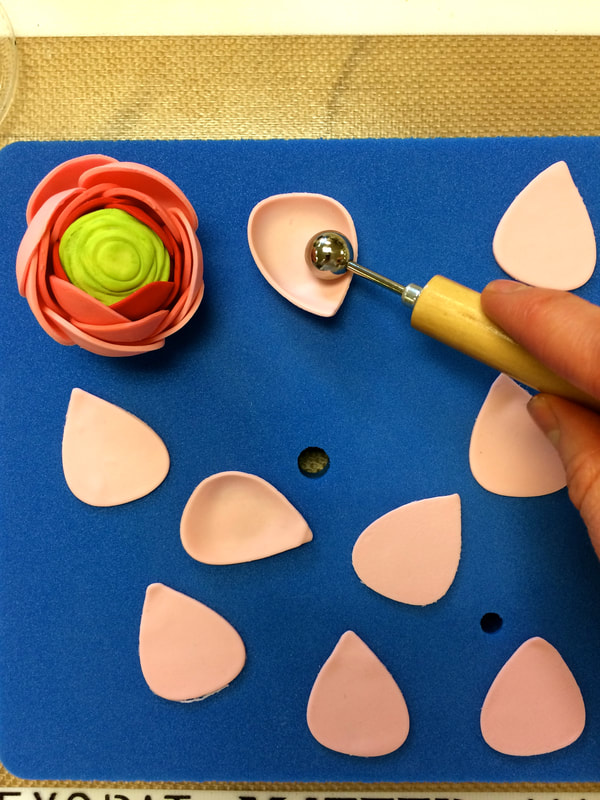 We had to buy a specific tool kit for this class, which I was really honestly quite happy to do. Some programs make you pay MANY DOLLARS for text books that you might only use once. I would much prefer to spend those dollars on baking equipment that I can now call my very own. I like to think of it as investing in new art supplies. A lot of it is stuff that I would never buy for myself... but now that I have it I am incredibly excited/inspired to use it! Would anyone like a cake with edible flowers on it? Cuz I really would like to make one. In fact, I've been pondering the possibilities of how I might just try to put edible flowers on everything and anything. If you invite me to a potluck, don't be surprised if I bring a big bowl of salad garnished with sugar flowers. Roast Chicken with roses? It would be good practice! Somebody please stop me. 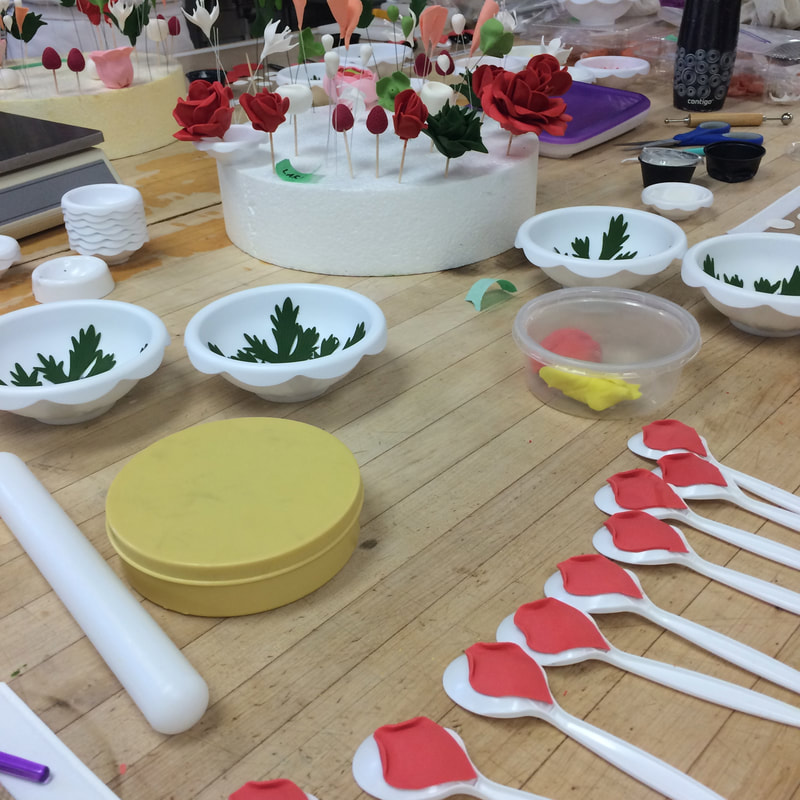 CREATING NATURE OUT OF SUGAR! Life is literally quite sweet. My Chef gave us a list of some incredibly talented sugar/gum paste artists that are big names in "The Industry". I always loved it in art school when our teachers would give us lists of names of artists to look at for inspiration, this is kind of the same thing. Looking at these people and their work up online changed my perspective on sugar flowers and opened my eyes to a whole other world of art making... this stuff is incredible!!! One can definitely get carried away, but it is inspiring to say the least. I've fallen in love with cake decorating all over again. Here are a few examples Chef gave:
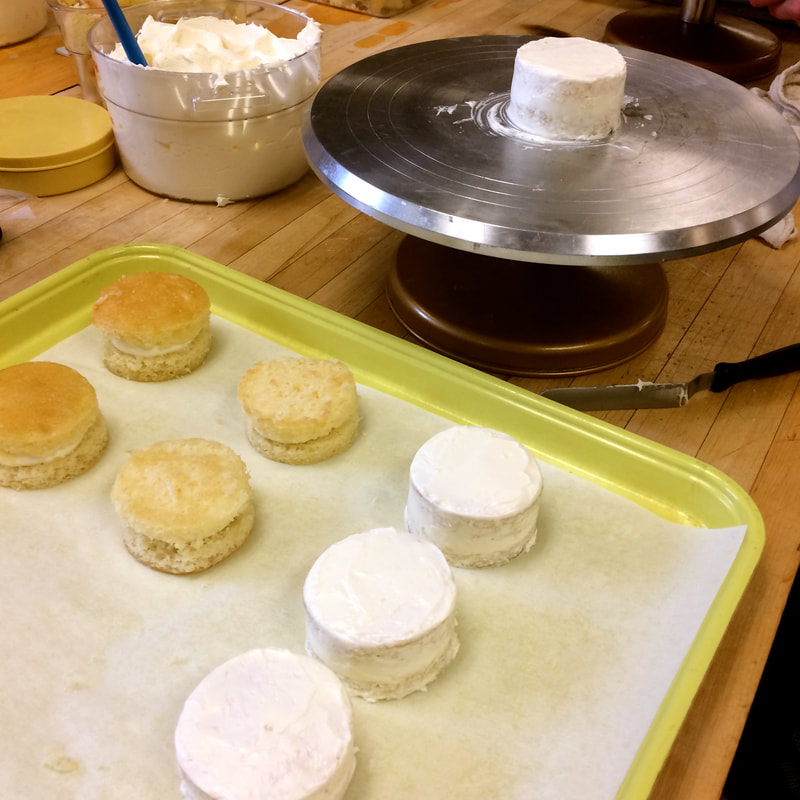 On the last day of classes this week we began to prep our cakes so that we can decorate them with all our sugar flowers later on. You can imagine my excitement when I learned that we would each get to make one larger, three-layered 6 inch cake, along with 15 MINI CAKES!!! I mean LOOK how CUTE they are!! Mini cakes are my new favourite, and now that's all I ever want to make. We cut the cakes, filled them with buttercream, crumb-coated and masked them. Next week, we cover with fondant and decorate! Happy Days. I was so stoked about my mini cakes that I had to take a photo. I needed to show their scale, so obviously I had to take a selfie. One of my Chef instructors was lurking in the background and made an excellent photo bomb, I love it. #pastryparty 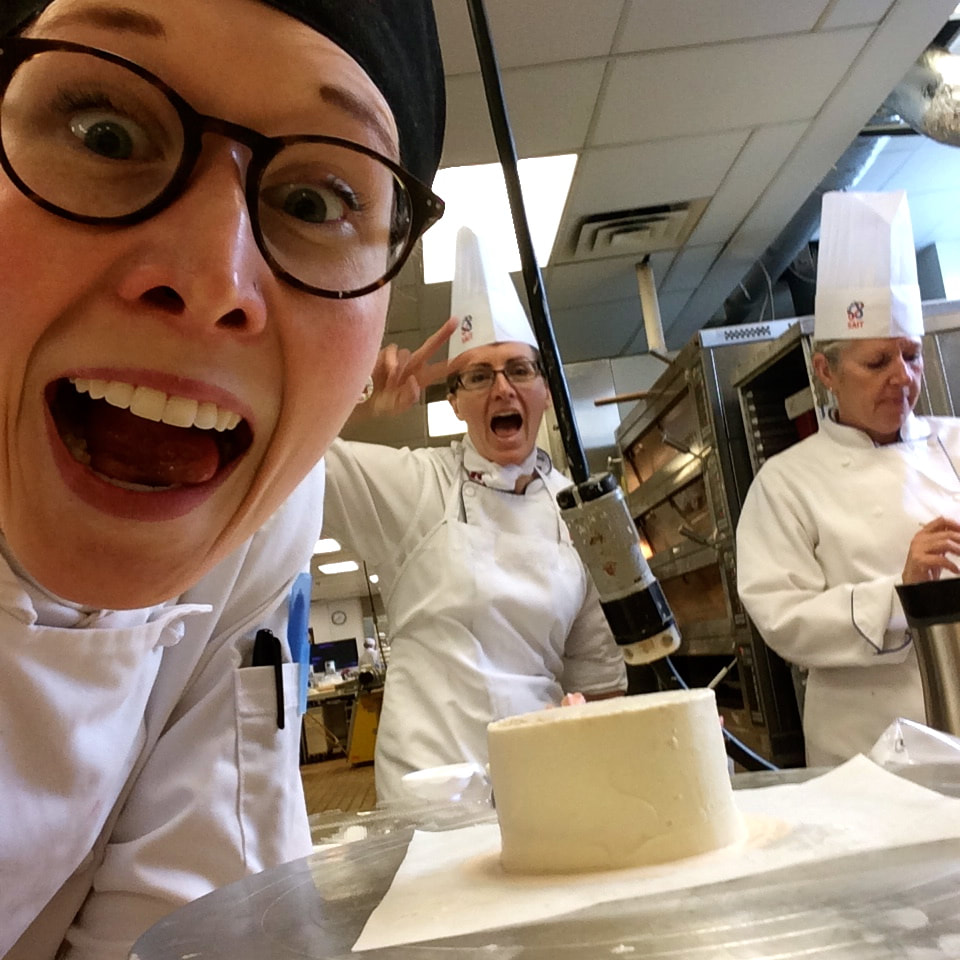 Can't wait for next week to bring these lil babies to life!
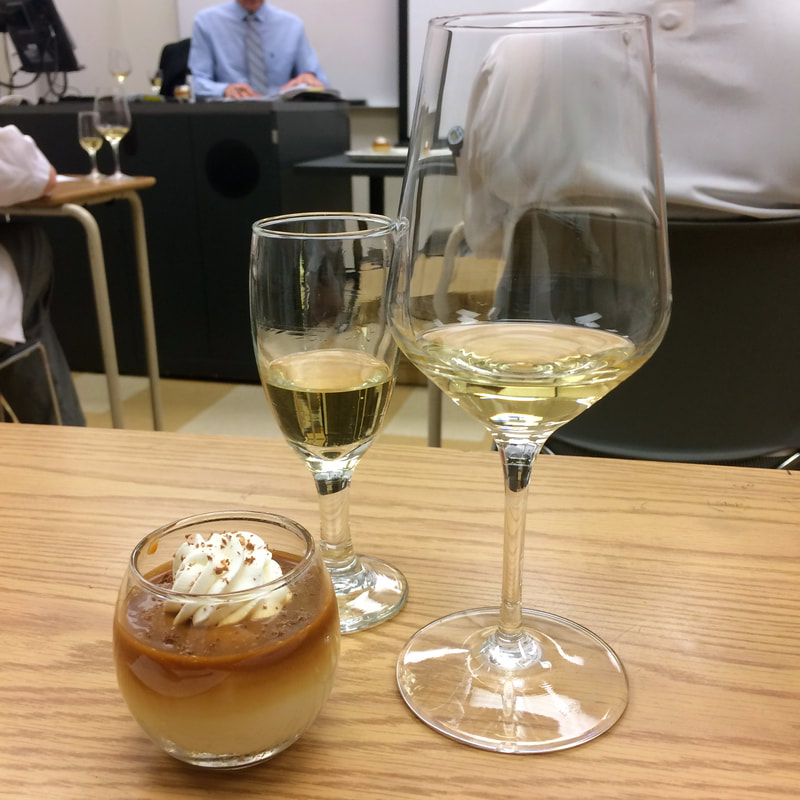
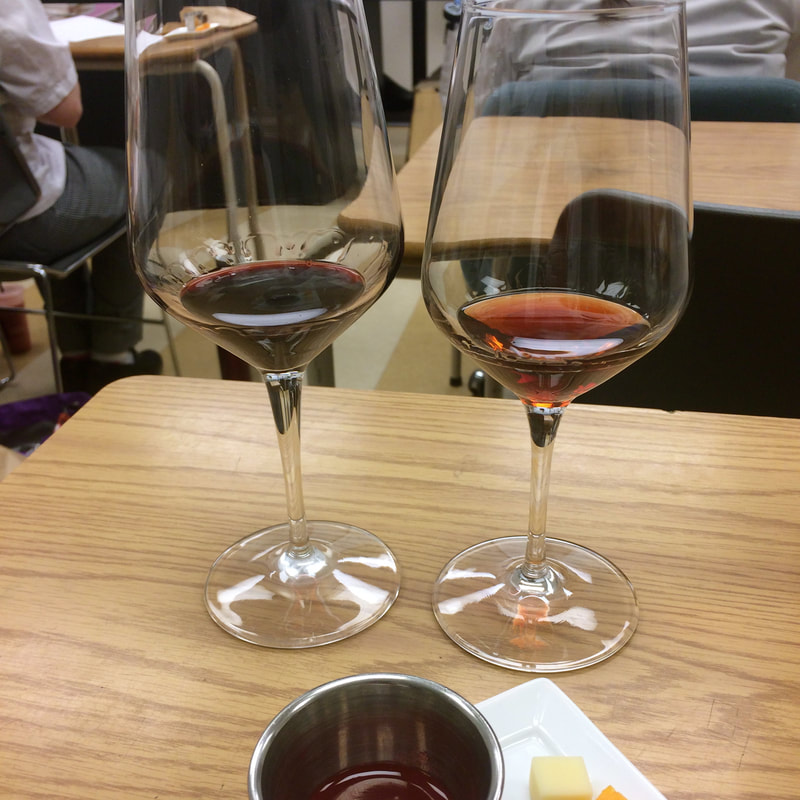
How fitting too that I just received a message of a potential wedding cake order... Life is sweet!! I'm in my very last semester of baking school, and doing my best to soak it all in and enjoy every minute... because I know that by the time it's all over I am gonna miss it! What a cool opportunity to get to learn from the very best chefs and bakers... nerding out about baking and getting to experiment and make SO many amazing and delicious things! It's pretttyyyyy incredible. 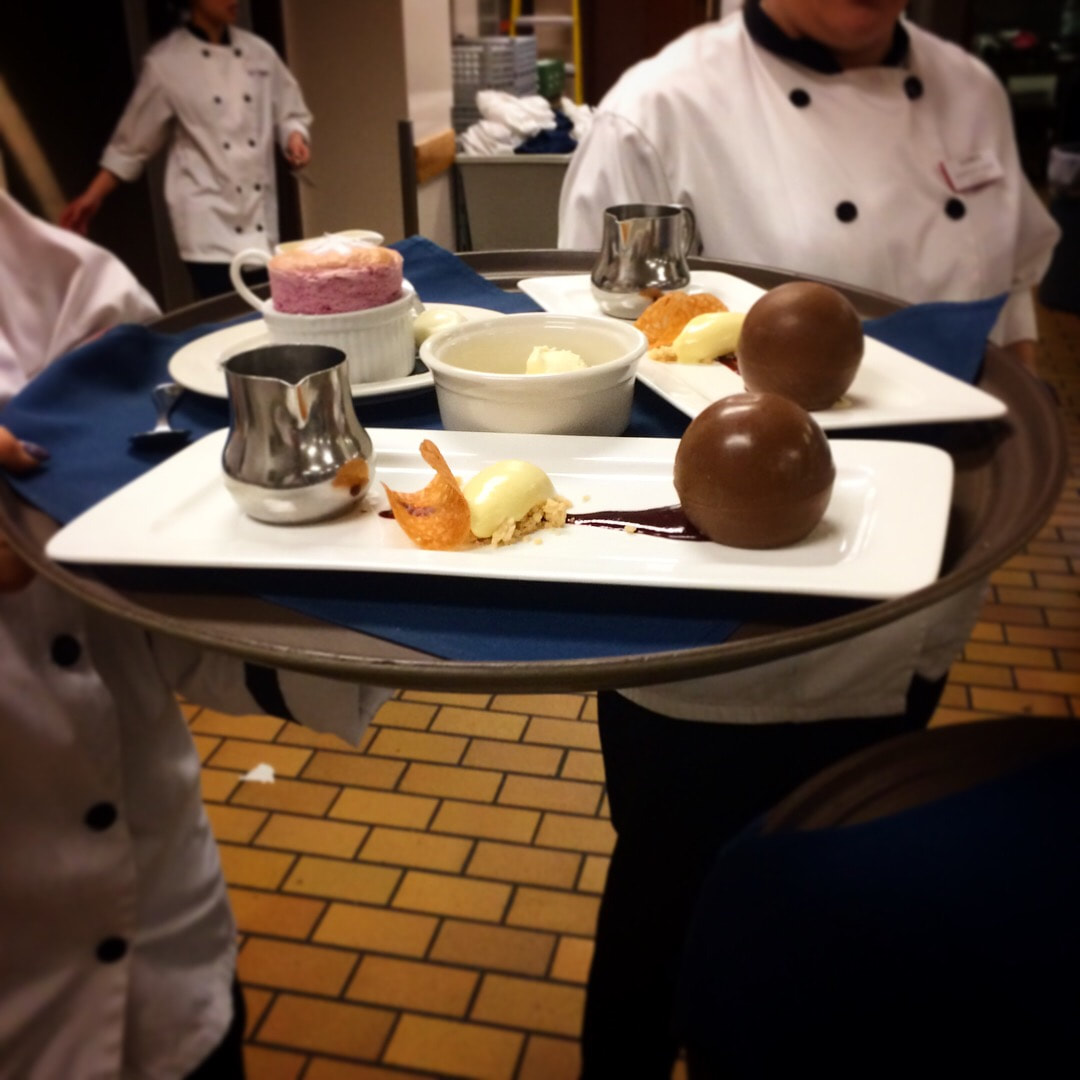 The past three weeks I took a class called "Plating and Pairing"... one that I was looking forward to most out of this whole semester. (even though I could say that about 90% of my classes). Here's a little peek into what went down over those three weeks, and a chance for me to review and reflect. Firstly, everyday at 3 pm we began with theory class. But this wasn't your average theory class. You can tell because most days when we walked into class you would expect something like this: 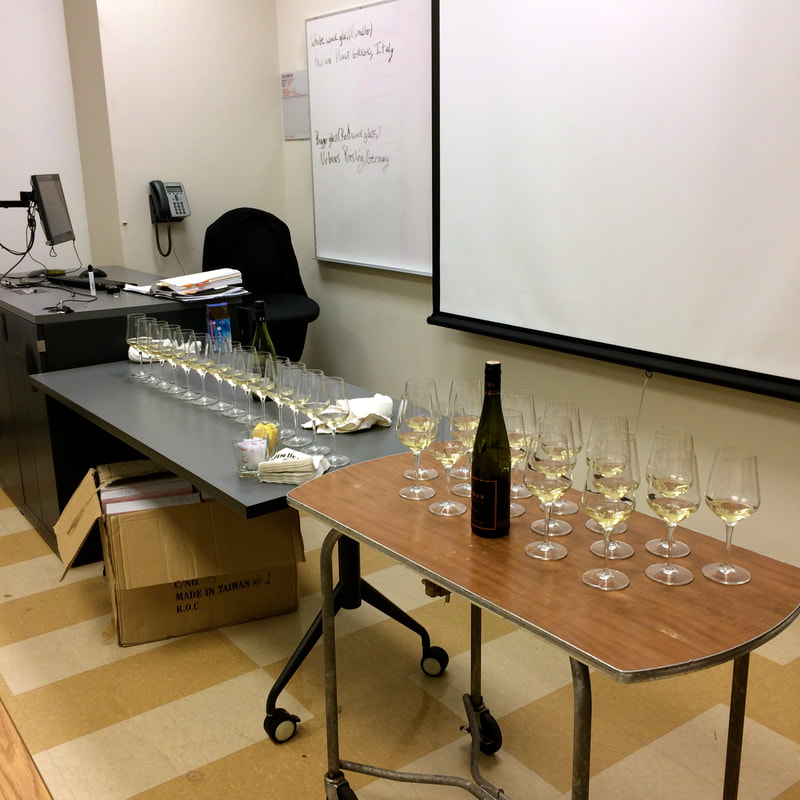 YUP! This was obviously the "pairing" portion of Plating and Pairing. We literally drank wine, ate desserts, and discussed why they did (or did not) pair well together. I learned a lot about wine tasting:
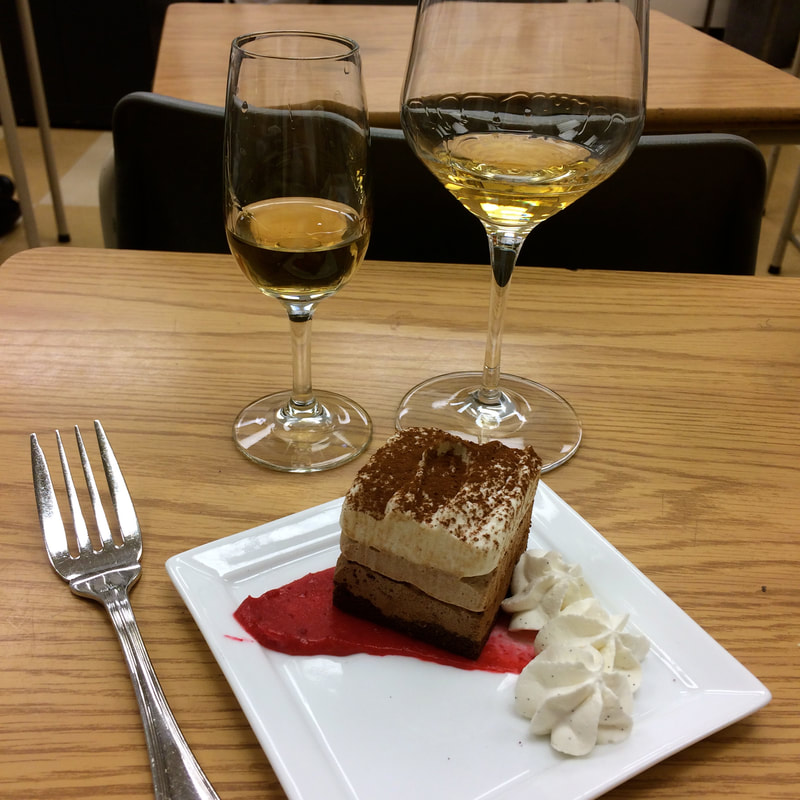
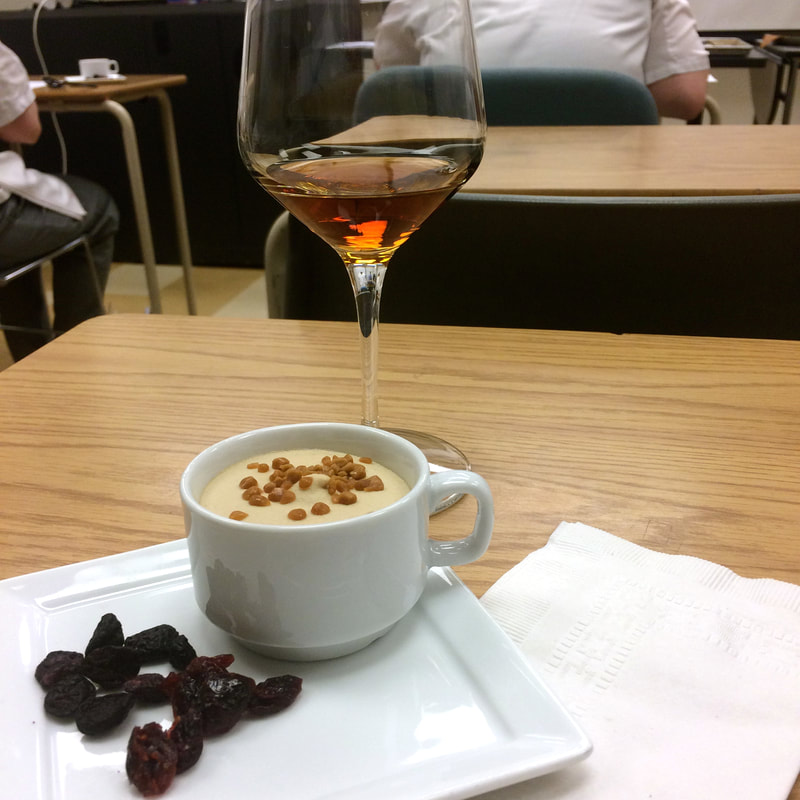
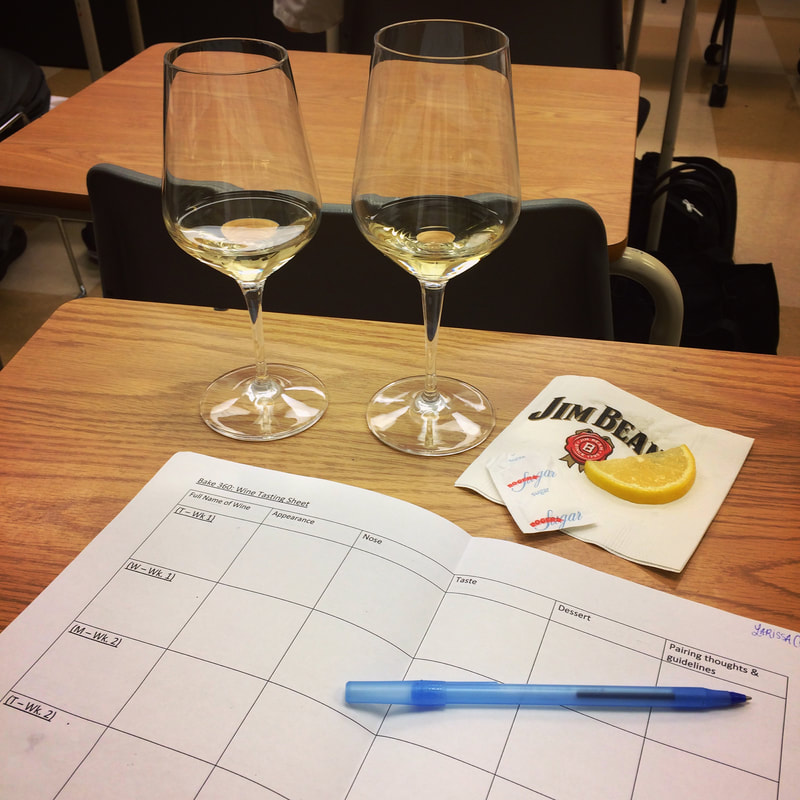 I also learned some valuable guidelines about pairing wine with dessert:
Just your average afternoon snack at school. One day we were even tricked into drinking straight whiskey! At first my body and mind were like "YEAH THIS IS FUN" but by the end of the three weeks I think I was looking forward to a change. Only because the catch is, after all these tastings in the middle of the afternoon, we would still have to stay up and finish the "plating" portion of the class with our Chef instructor. This took place at the fancy Highwood restaurant on campus, and would usually run until nearly 10pm, sometimes even beyond. As someone who is normally unproductive anytime after 8pm,and generally in bed by 9pm, this was my great challenge. 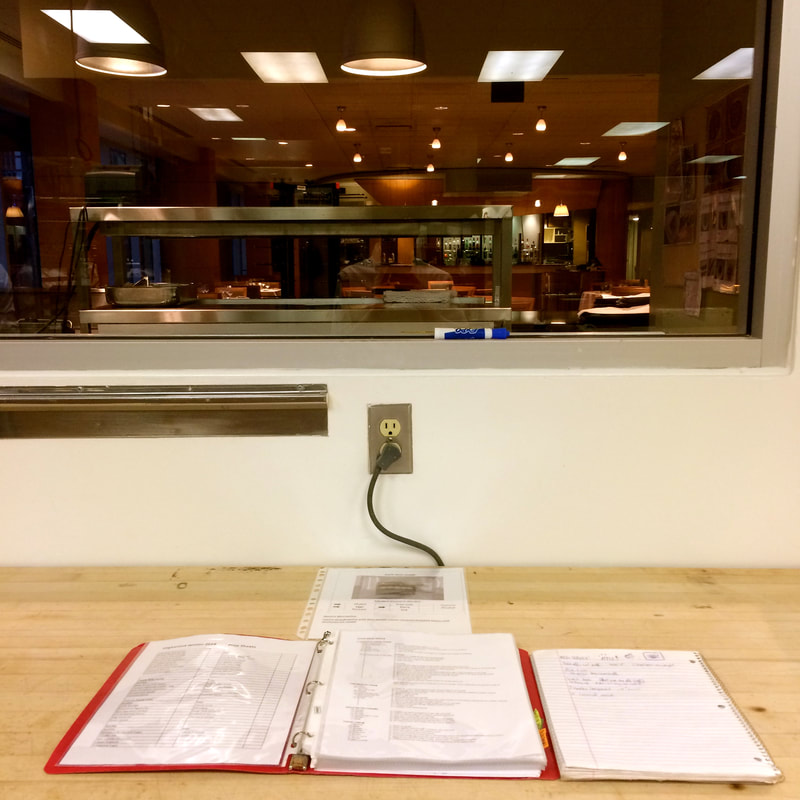 BUT ONE I WAS UP FOR! I was so eager and excited to get to do fancy plating in a real restaurant for real guests, learn some new recipes and techniques and to feel the infamous adrenaline rush of "The Dinner Service". I was not disappointed. It was stressful and frustrating at times, there was drama and miscommunications, there were more tasks than time, there was never enough space to work, and there was some negative energy lingering in the air at times... But I didn't want any of that to get in my way of enjoying all the new and exciting things I was experiencing. Our Chef created the entire menu, built out of recipes from moments here and there from her career and competitions. Every plate was BEAUTIFUL, and incredibly delicious... I confess that I wasn't expecting to like each and every plate so much, but I did. Usually when I order dessert if I see "chocolate" I look no further. But these plates were so creative and of such high quality that I don't even think the chocolate one (although amazing) was my favourite in the end! (That is saying something). 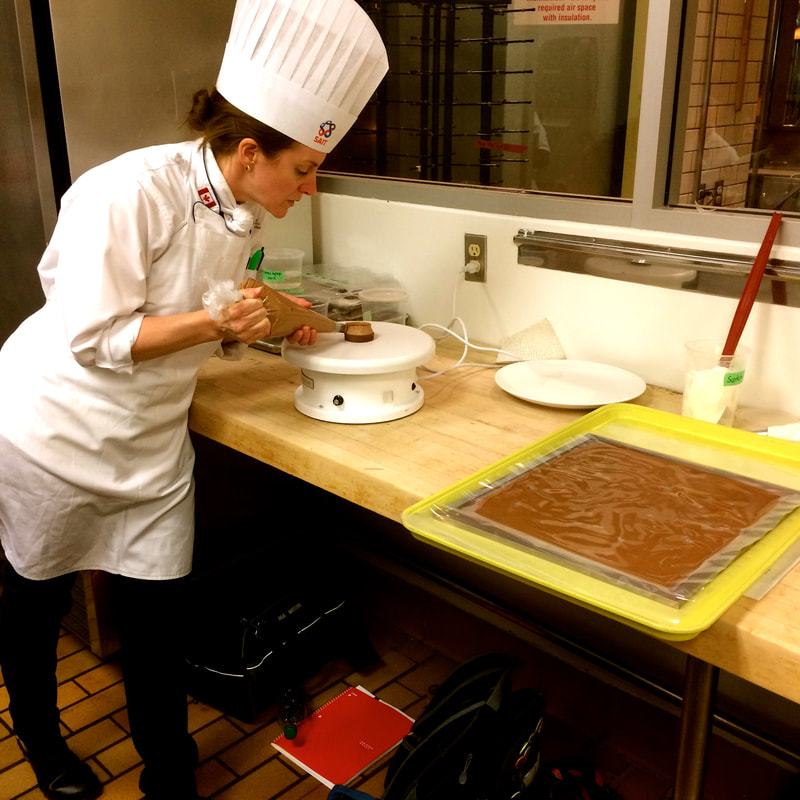 Here is our Chef, showing us how to create the Chocolate dessert. There's a reason they call our program Baking and Pastry Arts I tell you.  Every night, guests at the restaurant chose from this menu:
The Prep People did things like baking bread for the bread baskets, making up pretty little plates of petite fours that each table received with their bill at the end of the meal, and designing and preparing for the specials of the day. The Service Team worked on the restaurant desserts, and were each responsible for plating one dessert and running that station during service time.
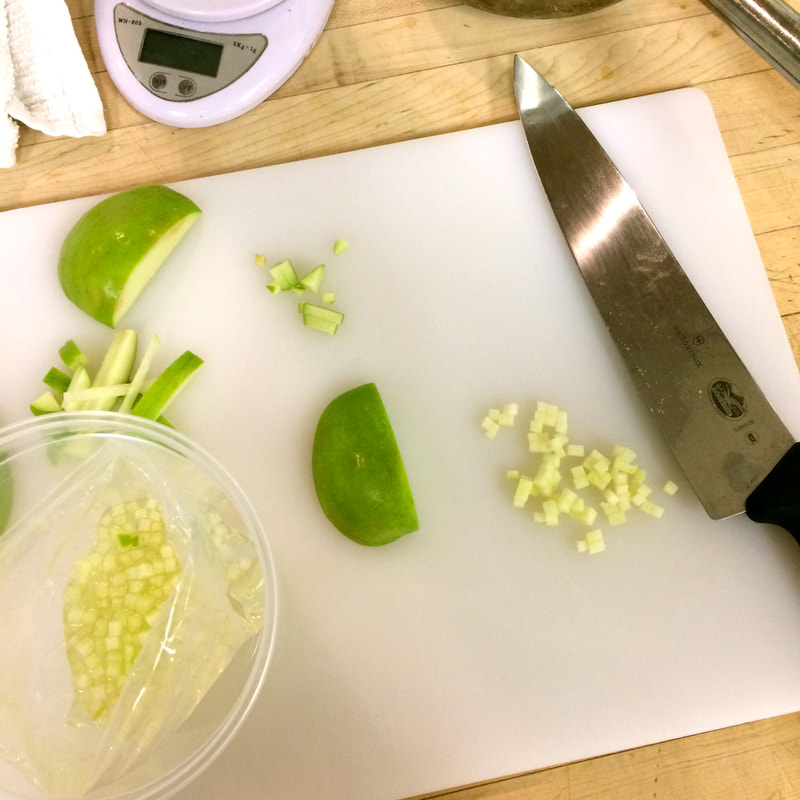
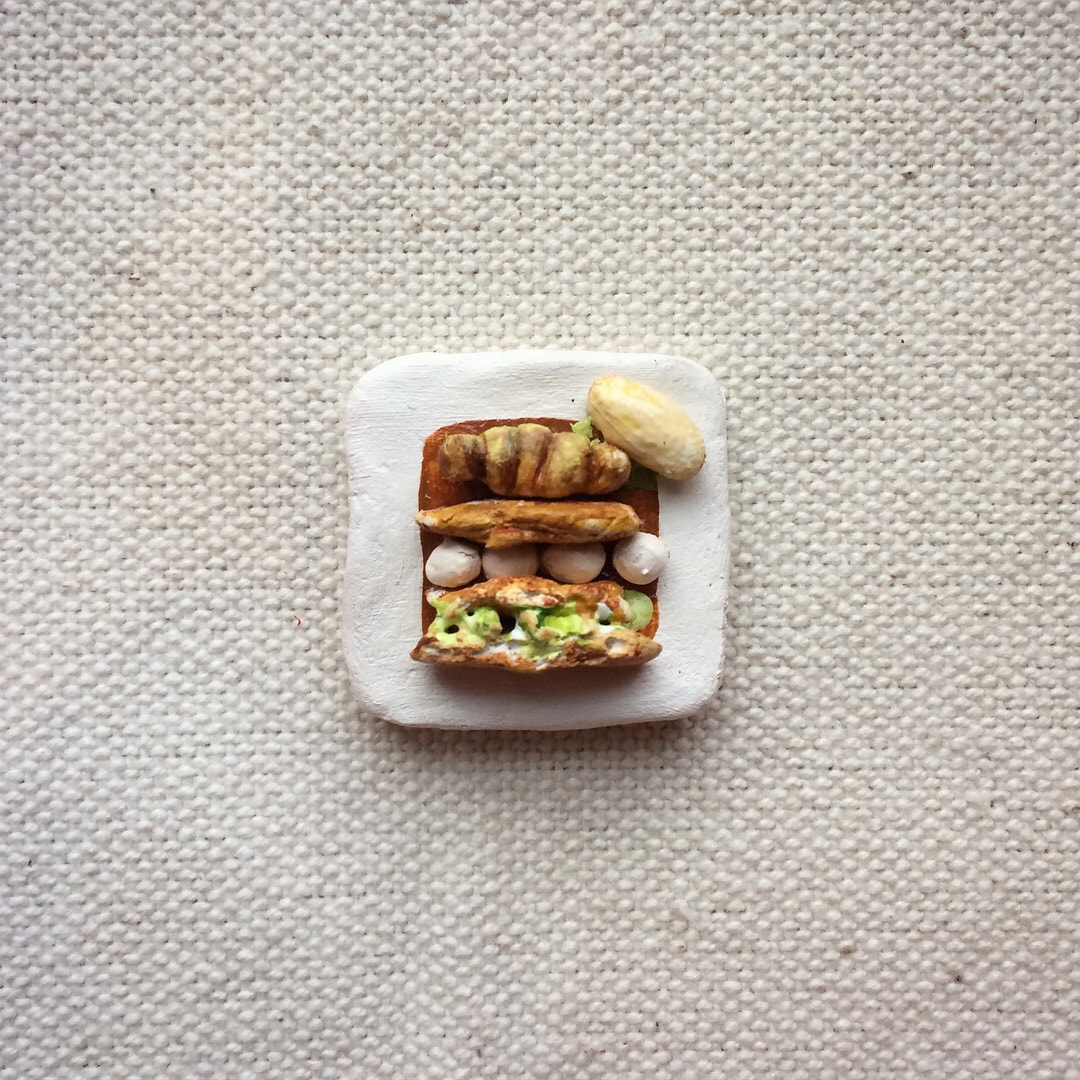
One of the first stations I was in charge of was the Caramel Apple Mille Feuille, which we referred to simply as "Apple". For one reason or another I fell in love with this dish... All the components were simple but soooo tasty and when they all came together on the plate it was just magical! I got lots of knife practice while brunoise-ing apples. Chef told me that she wanted them super tiny, so that they looked like little jewels. I also gained confidence in using the dreaded-potentially-explosive Kryovac Machine... It never exploded on me thank god and it was pretty magical watching all the little bubbles of air being drawn out from the apples, and then a pause, before the big SWOOOOOOOSH when the bag was vacuum sealed shut. All the excess air in the fruit is replaced by the liquid in the bag, making the apples EXTRA FLAVOURFUL. Kitchen magic I tell you! Don't get me started on the apple-caramel sauce, the scotch-spiked-diplomat cream, and the cinnamon ice cream!!! There was also something terribly pleasing about a square dessert on a square plate. 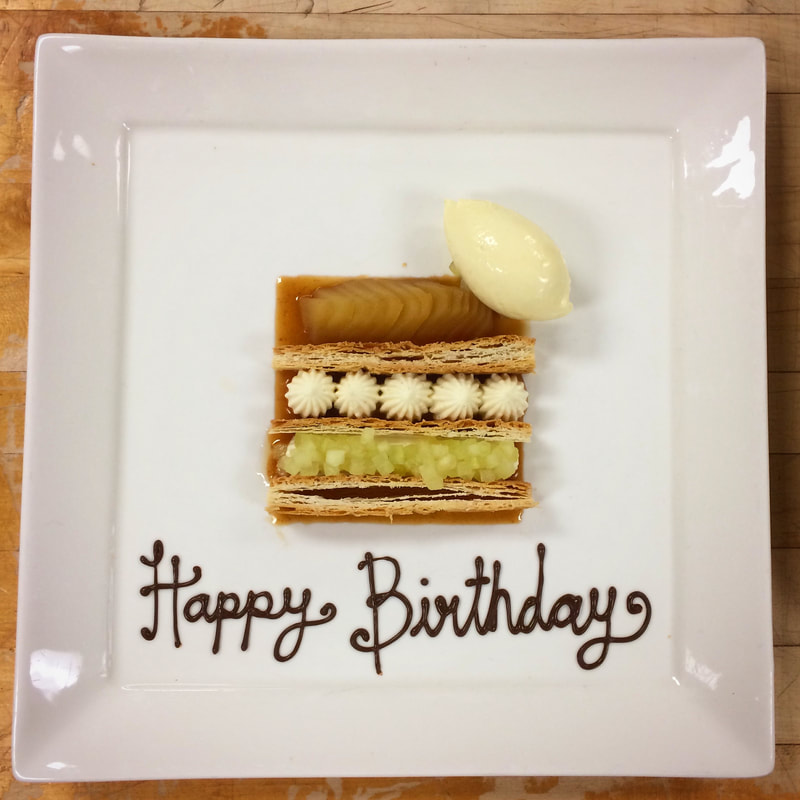 We even got a few chances to practice our piping skills when there were special requests for "Happy Birthday" messages! Next evening, I was in charge of plating the Special, which made me feel indeed special. I did not get to invent the dessert, rather my talented and creative classmate did. I just put the items on the plate the way she had designed... Her creation was AMAZING: chunks of brownie topped with passionfruit ice cream that was covered by a chocolate dome. The servers would then pour a warm raspberry-chocolate sauce over the dome as they presented the dish to the lucky guest. Because the sauce was warm, it would melt away the chocolate dome, revealing the tasty interior! Oh the chocolately drama! I was a fan. 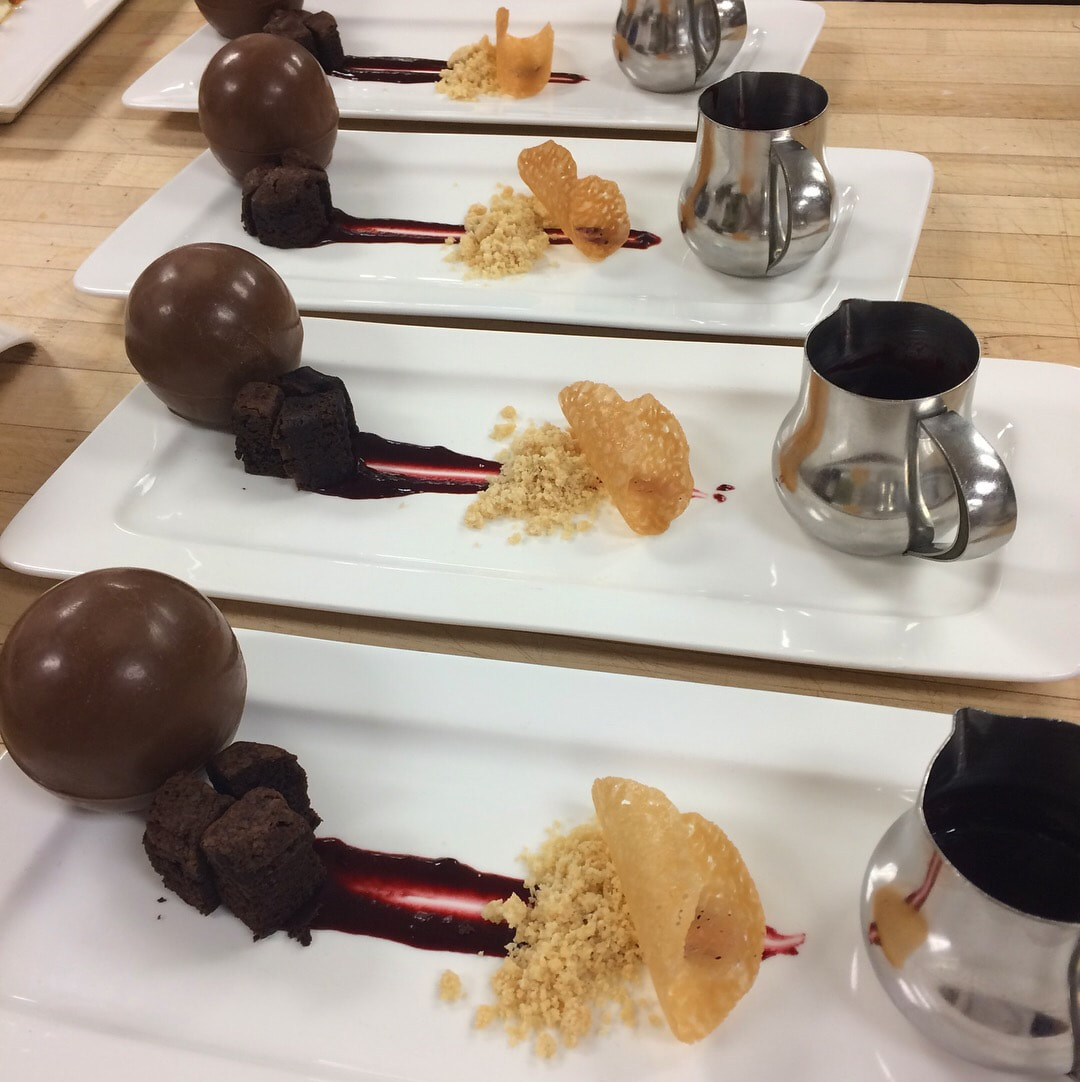 Here you can see the plates before they have the addition of the passionfruit ice cream, which must be scooped at the last minute when all plates for one table are ready to go.
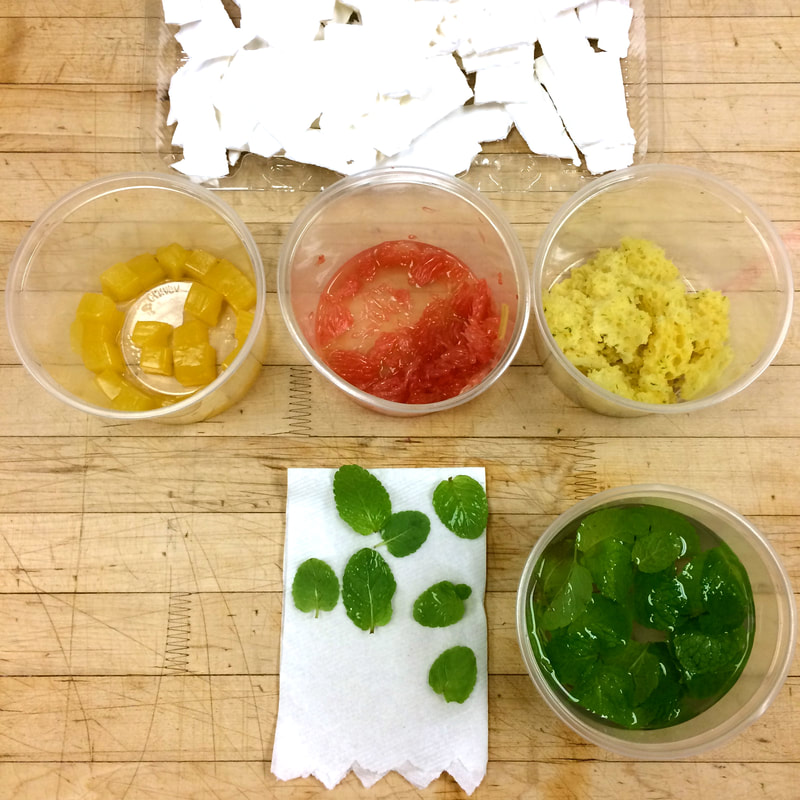
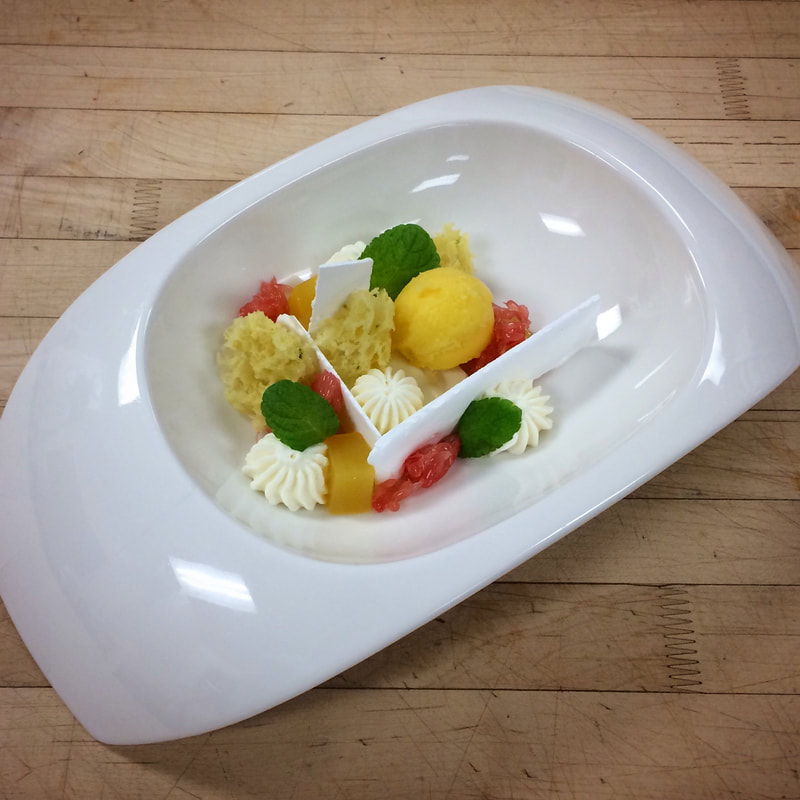
The next evening I got to plate up the modern art spaceship masterpiece known as the Paloma Panna Cotta. A Paloma, if you don't know, is a super delicious cocktail containing tequila and grapefruit juice. YES. A Panna Cotta, if you don't know, is a fun little jiggly Italian dessert that can best be described as milk jell-o. Sounds gross, but truly it is tasty. This dessert features a tequila-white-chocolate-lime panna cotta, grapefruit jelly blocks, lime sponge cake, mandarin sorbet, grapefruit-white-chocolate ganache, fresh grapefruit flesh and fresh mint leaves. It is citrus season after all. (Did you know grapefruit is called grapefruit because, unlike other citrus, it grows in bunches on trees like grapes? fun fact) 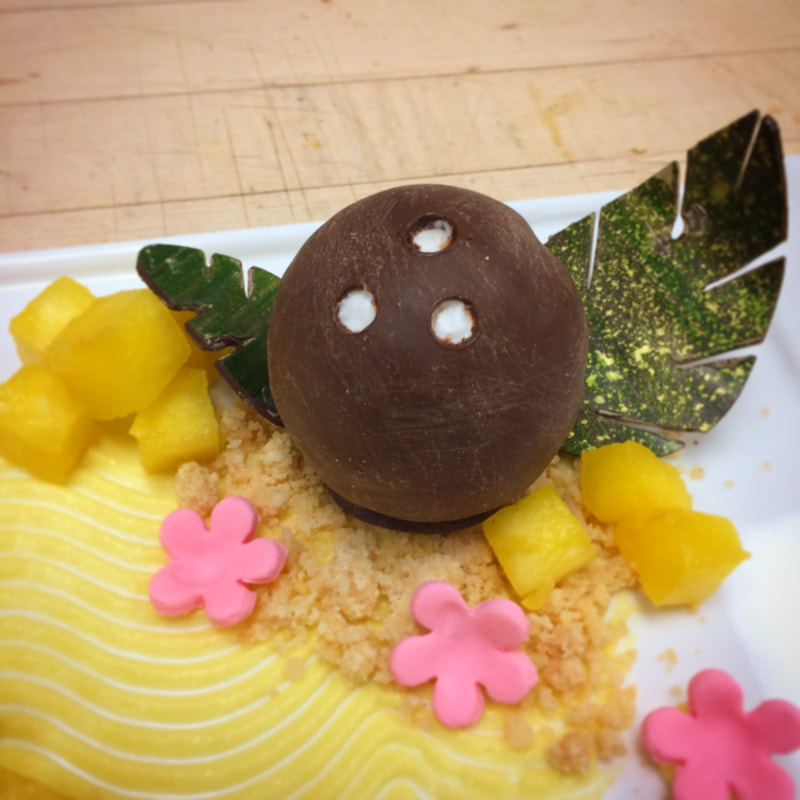 The cutest dessert was the Tropical Coconut Pavé: Chocolate covered coconut mousse "coconuts" filled with passionfruit curd, coconut dacquoise, and chocolate ganache. OMG SO YUMMY. Also chocolate leaf garnish and fondant flowers, shortbread crumble and fresh pineapple. Plating all these was incredibly fun. I would hold my breath when a new ticket came in, hoping they would call out my dessert. I always got stoked when my station got an order.
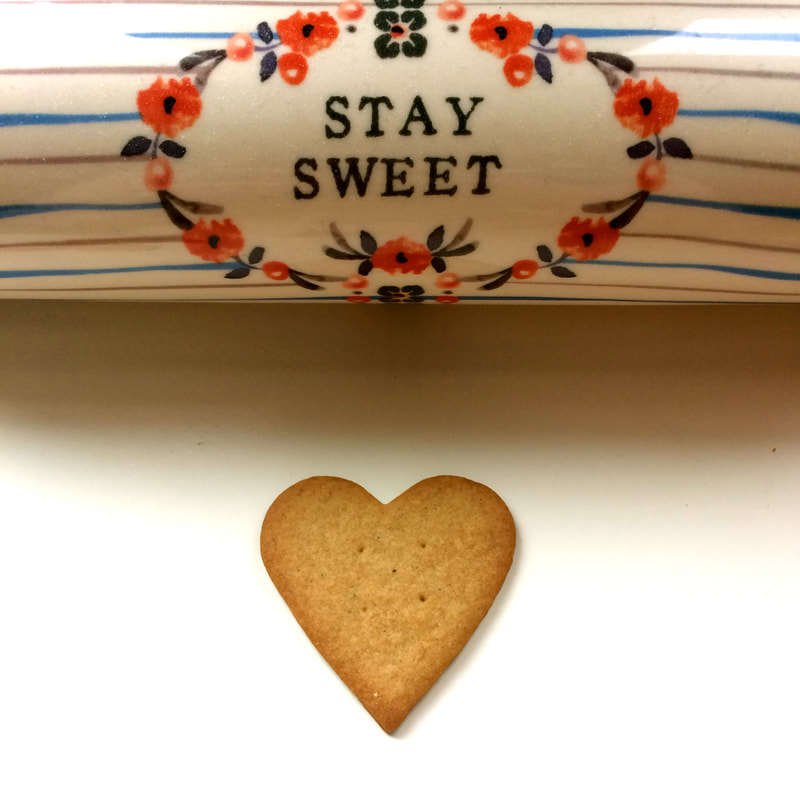
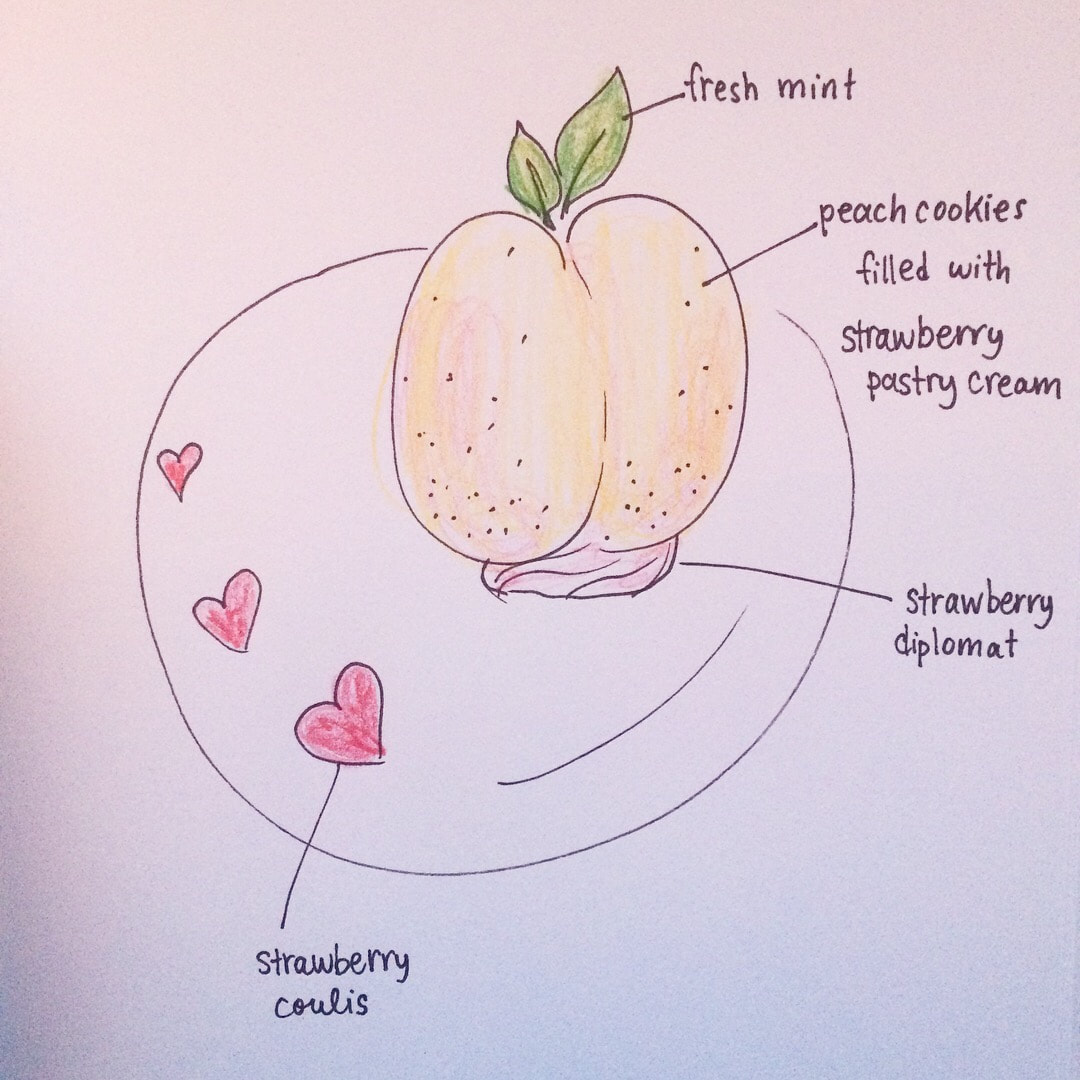
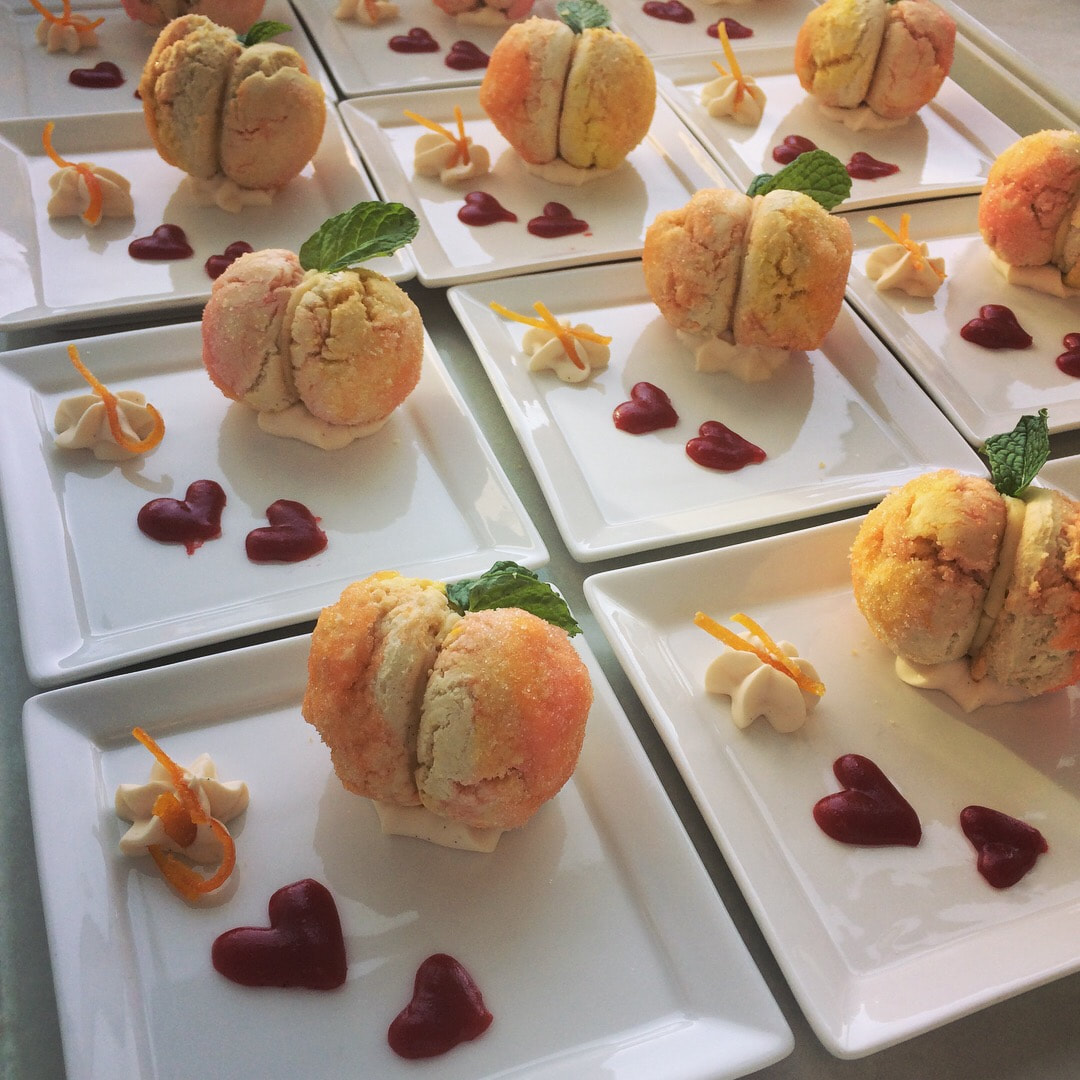
We had a super fun project in which we were to design a dessert menu for a theoretical restaurant of our own invention. I got carried away, and created a fake restaurant that I now really want to be a reality. Long story short, it's a place where the desserts are inspired by local, contemporary, emerging artists. I imagined up six plates inspired by six different artist friends of mine. I couldn't stop thinking about wanting to actually bring these desserts to life. One day in class, I was instructed to make a dessert, without any guidelines, it could be whatever I wanted. I jumped at the opportunity and brought to life one of my drawings: A booze-soaked cookie that looks like a peach, filled with strawberry pastry cream, and garnished with strawberry coulis hearts on the side. Basically something that was unapologetically cutesy, trendy and feminine. In this regard, I succeeded. 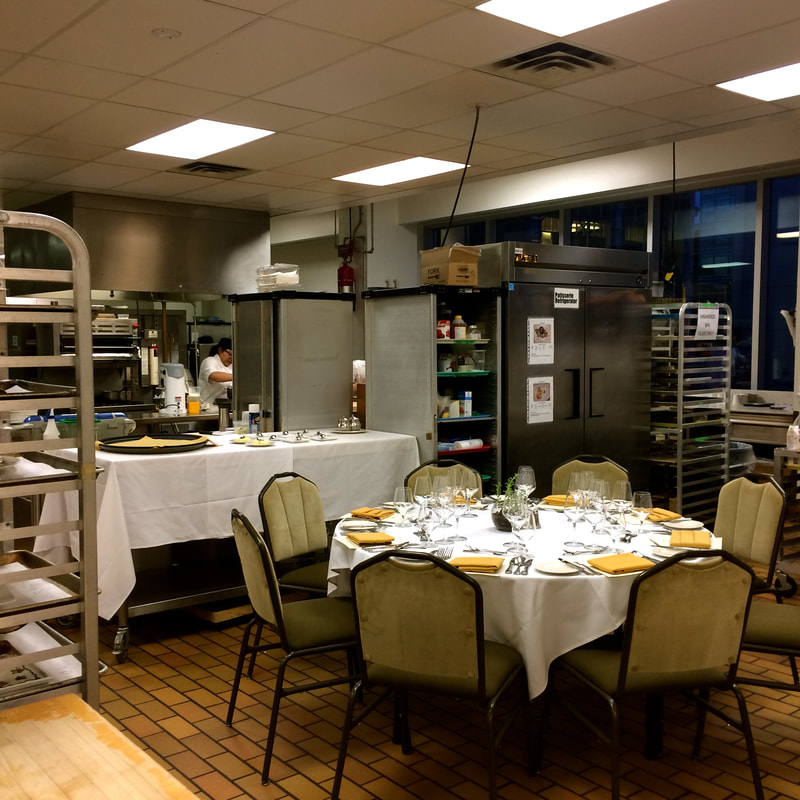 On our final night of service, we had something called "Chef's Table", in which a dining table is literally plunked right in the middle of the kitchen, and a group of certain special-very-importants get to dine in the middle of the action. It also means we have to be extra aware of our cleanliness and professionalism. So obviously I donned my favourite red lipstick and tried to play it cool. The hardest part was when the wine was poured and plates got served and I realized that actually I was STARVING. But my time to eat would be later. A snack at 4 pm and a snack when I got home at 11 pm was my new dining routine. Not my ideal scenario, but such is restaurant life, and it was worth it for the experience. 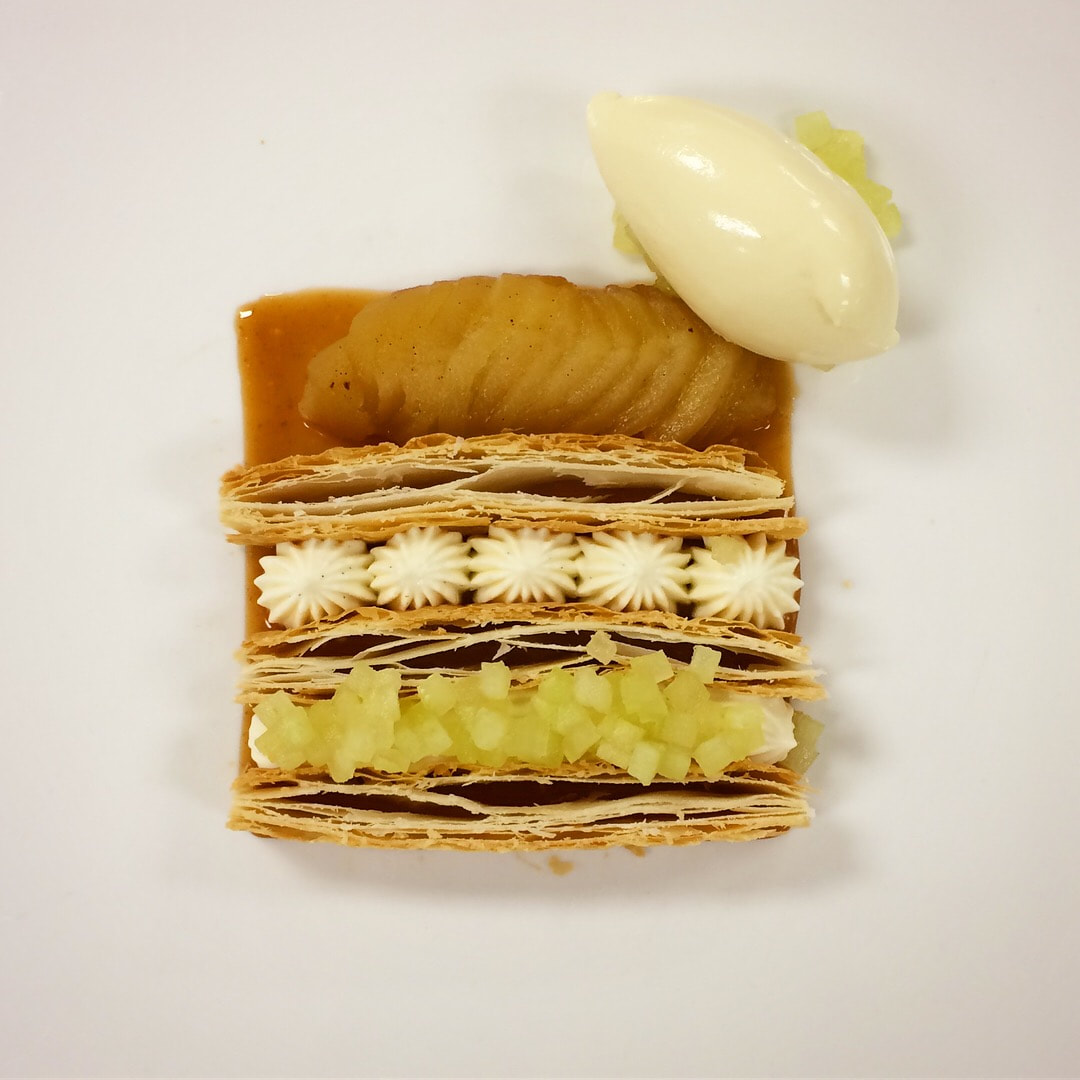
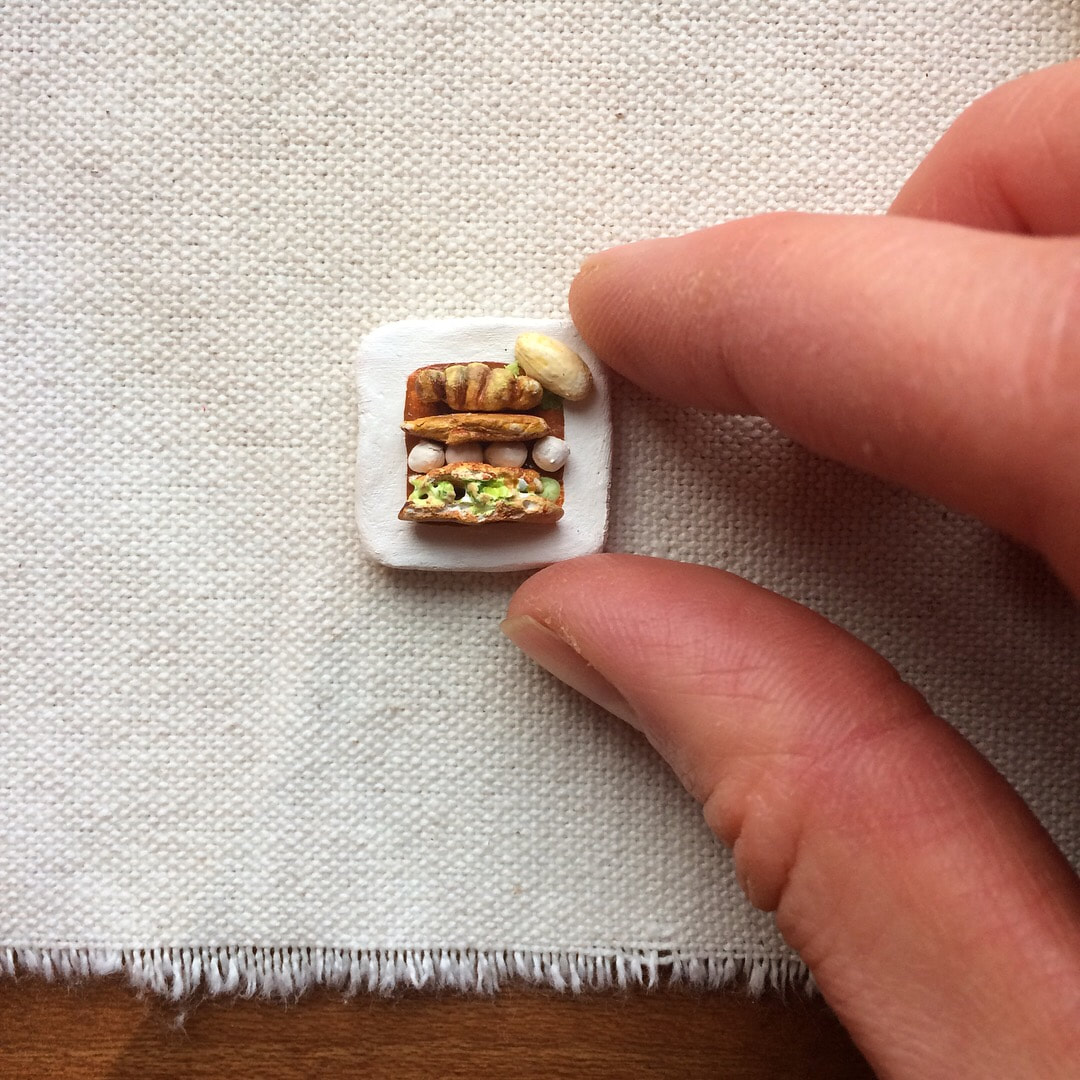
And of course, what would a Tiny Tea Party post be without something tiny? Baking school has inspired me as an artist more than ever, I keep coming up with ideas for paintings, projects, sculptures, all inspired by the stuff I have been learning and making at school. I simply had to turn the work of art that was the Apple dessert into a mini sculpture. I gave it to my Chef on our last day of the class as a small token of my gratitude.
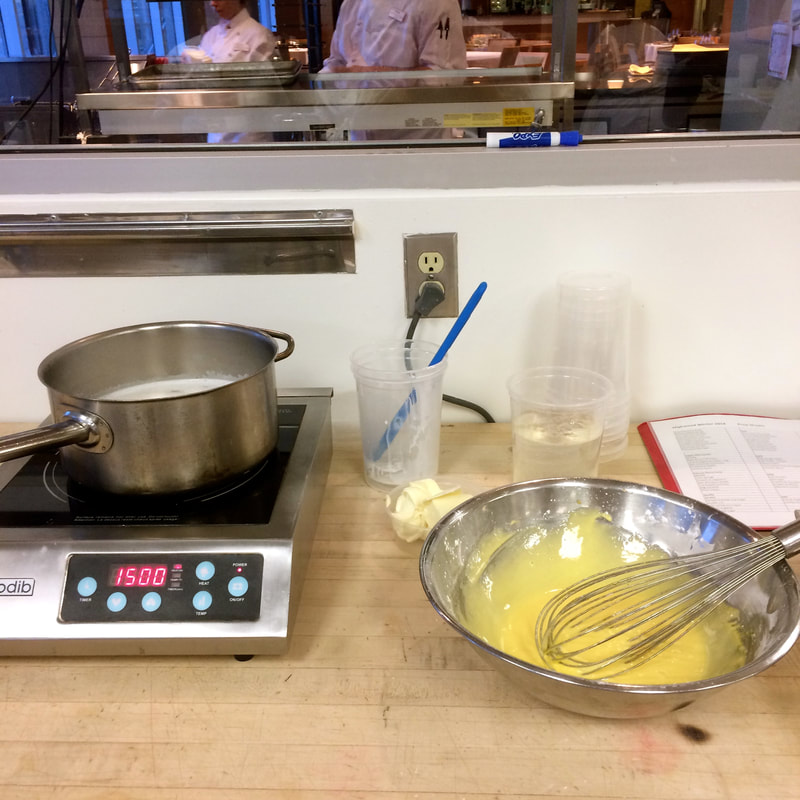
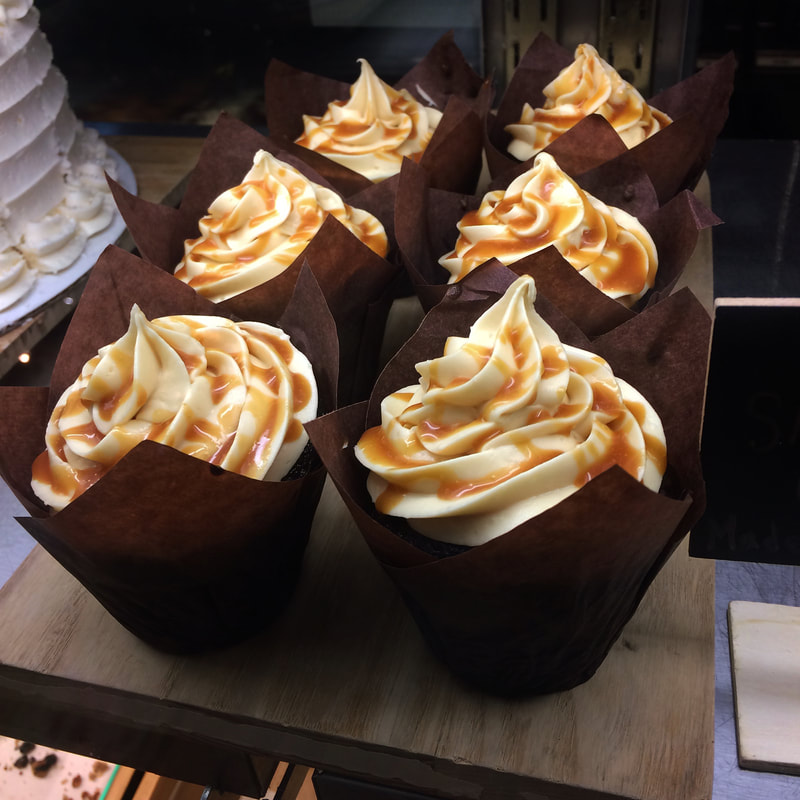
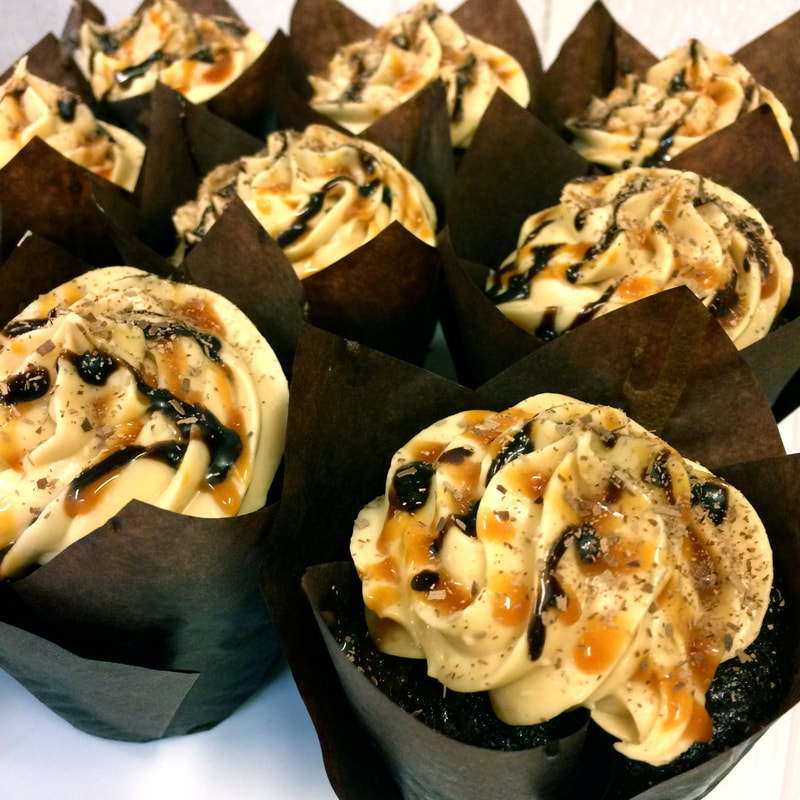
I think my most favourite take-away from this course was learning how to make a sponge cake in the microwave. No jokes. Who would have thought all this time and training would amount to the satisfaction of baking a cake in the microwave. It's my new favourite party trick. I'm not sure if I'll ever get to work in a restaurant plating desserts to order again, so I will look back at the past three weeks with a newfound fondness and respect, and continue dreaming up menus and plates and garnishes and more... just in case. 2017 Williams Sonoma Peppermint Bark Challenge: Cupcakes, Drama, Acceptance, and a Saucepan11/24/2017 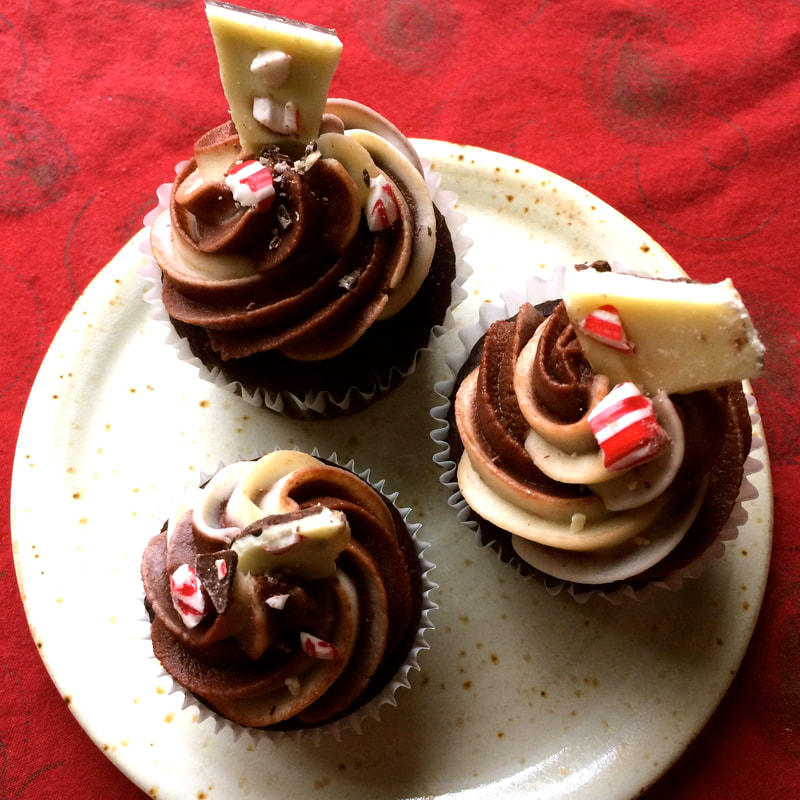 This year I had the wonderful opportunity of participating in a little friendly baking competition, held by the good people of Williams Sonoma and the SAIT Baking and Pastry Arts Club! Here's the deal: Williams Sonoma gives a participating SAIT baking student a bag of their famous "Peppermint Bark" with which said student must create some kind of tasty treat. All students then bring their creations to the three judges: two representatives from Williams Sonoma, and a Chef Instructor from SAIT. They taste all the treats, and pick their top three based on certain criteria. These lucky top three will then get to make MORE of their product, to serve at a Williams Sonoma event the following week, where they will be eligible to win a people's choice award, resulting in the publishing of their recipe in the Williams Sonoma Newsletter, and of course wonderful bragging rights!! Being somebody who enjoys peppermint bark, adores Williams Sonoma (I'm like a kid in a candy store there), and is pretty much constantly thinking about baking if not actually baking, this was a challenge I was eager to accept. When I first signed up for the challenge I reeeeeeally wanted to get into the top three! It sounded so achievable and so awesome and I wanted to do well! The first idea I came up with was to make cupcakes: recently I had been making these grand chocolate cupcakes for the cafe where I work. They had been receiving rave reviews! I thought if I could make those chocolate cupcakes, with a frosting using the peppermint bark, I would have a decent chance of getting top three.
After a very long day of baking at school followed by baking at work, I came home to continue baking late a night for this challenge. This resulted in me feeling very exhausted and maybe not able to give my 100% passion and love into my baking. You might ask, why would you do this to yourself, Larissa? Well I am a busy gal and unfortunately I had no other ideal time and the competition is TOMORROW. I set about making my frosting first: a basic cream cheese buttercream to which I would add the melted peppermint bark. I tasted the peppermint bark and was pleased to realize that it had a lovely peppermint flavour incorporated into the chocolate itself, not just from the chunks of candy cane that scattered it's surface. I knew if I melted this down and added it to my frosting, maybe with a bit of cocoa powder, I could create a chocolate-peppermint frosting! Perfecto! I added some of the melted bark into some of my frosting and gave it a stir. WITH HORROR I suddenly realized that the chocolate mixed with frosting was beginning to SEIZE! A pastry chef's worst nightmare let me tell you! With achey legs and tired eyes I frantically assembled my standing mixer and tried to beat my frosting into something workable. But alas... it was to no avail. The mixer paddle just beat my gross, separated, greasy blob of frosting around the bowl...I felt utterly defeated. And mad at myself no less! I should know better. Temperatures are v v v important in the pastry world I was not paying enough attention to the temperatures of my ingredients. I tasted this sad excuse of buttercream and was re-assured the tiniest bit, as it still tasted delicious. It's texture however was all wrong and was very much un-usable... running out of time, I was given no other option but to throw it in the trash. Lucky for me, I still had some of my plain butter cream left over. Time for plan B. Instead of incorporating just the melted peppermint bark, I would first use it to make a ganache to stir into my buttercream. So, I chopped the chocolate bark into small pieces and poured over some hot heavy cream. I patiently stirred until I had one cohesive mixture. I strained out the little bits of candy cane that remained, until I had the silkiest smooth ganache. It was this that I (carefully) beat into some more buttercream, along with cocoa powder to create a mighty tasty chocolate-peppermint butter cream. SUCCESS. My cupcakes are SAVED. Meanwhile I had mixed up and baked my chocolate cupcakes and was eager for a taste test. I have made this recipe multiple times before but somehow when I tasted one this time something seemed different... I'm still unsure of what exactly it was, but they just didn't seem as good as when I have made them for the cafe. So at this point I've had both major and minor failures and am starting to doubt my abilities as a baker and a human being and feeling pretty darn low. It's way past my bedtime though and I have to wake up at 5am to go to class the next day, and have a full/busy day ahead of me. So I say to myself "it's just cake" and try to turn off my negative thoughts so that I can go to bed. As I moved on from the cupcake drama, I reassured myself. This cupcake does not define me. Perhaps this competition is not my time to shine, there will be other times, but this was just not meant to be. According to the circumstances and all the other things that were happening that week, fate would not let me shine in this competition. I knew that as long as I had a decently pretty, edible cupcake that I was semi proud of, that was all that I needed to make me happy. I was not going to win, but I could still enjoy the act of participating. With this attitude, I completed my cupcakes the next day with the 45 minute time window I had to do so. I wanted to echo that two-toned chocolate look that the peppermint bark has. So I filled my piping bag with half plain white buttercream, and half of my chocolate-peppermint buttercream. This creates a super fun swirl effect when you pipe the buttercream onto the cupcakes. MAGIC! Garnished with a shard of peppermint bark and chunks of the candy cane, the cupcakes actually looked like something I could be proud of! I cut one into quarters to share with my family, and so I could get an idea of what I would be serving to the judges. Well gosh darn it, who would've known... it was delicious! Somehow overnight, my cupcakes magically transformed into a beautiful scrumptious treat. My family praised my efforts and suddenly I was feeling OKAY. Great even! 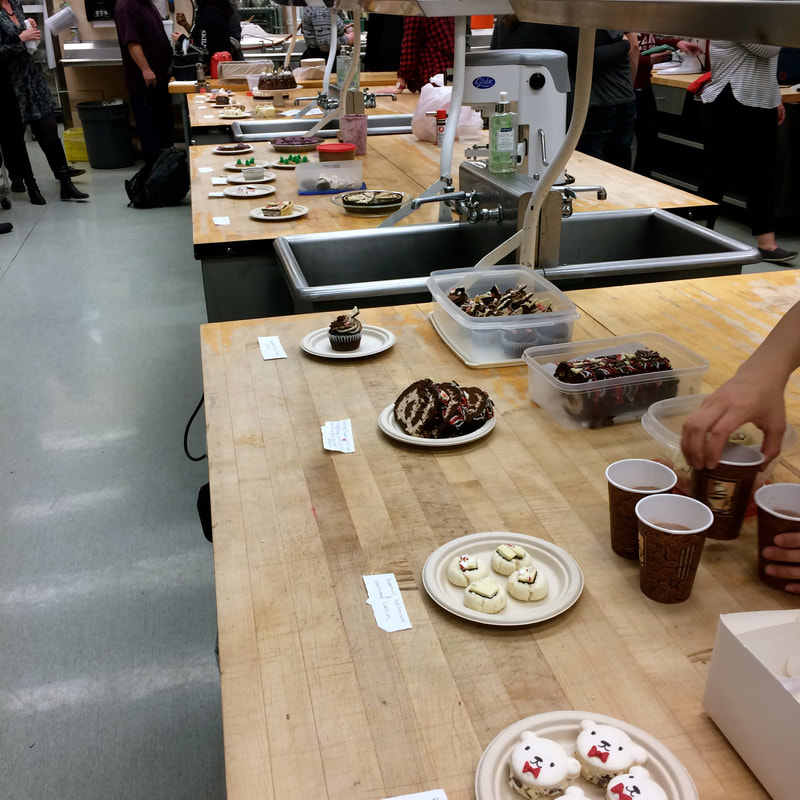 At peace with myself and my cupcakes, I carried them proudly into the judging room. To keep this long story somewhat short, I can tell you that I did not place in the top three, and I would not be moving any further along in the competition. I was okay with this now though, I was just proud of myself for trying, and for producing something that I was content with. I got some compliments from fellow competitors who sampled my cupcake which made me feel great! BUT WAIT just when I thought that was that... the lovely Williams Sonoma representatives came bearing GIFTS for all the participants who were not selected as the top three! Not just little gifts either, but brand new, shiny, good quality cookware! I'm talking pots and pans of various sizes with lids so shiny you can count your freckles in. I was given a 1.5 litre saucepan and let me tell you I am thrilled. I was already excited to think about what I would cook in it first. How generous! Thank you to Williams Sonoma! 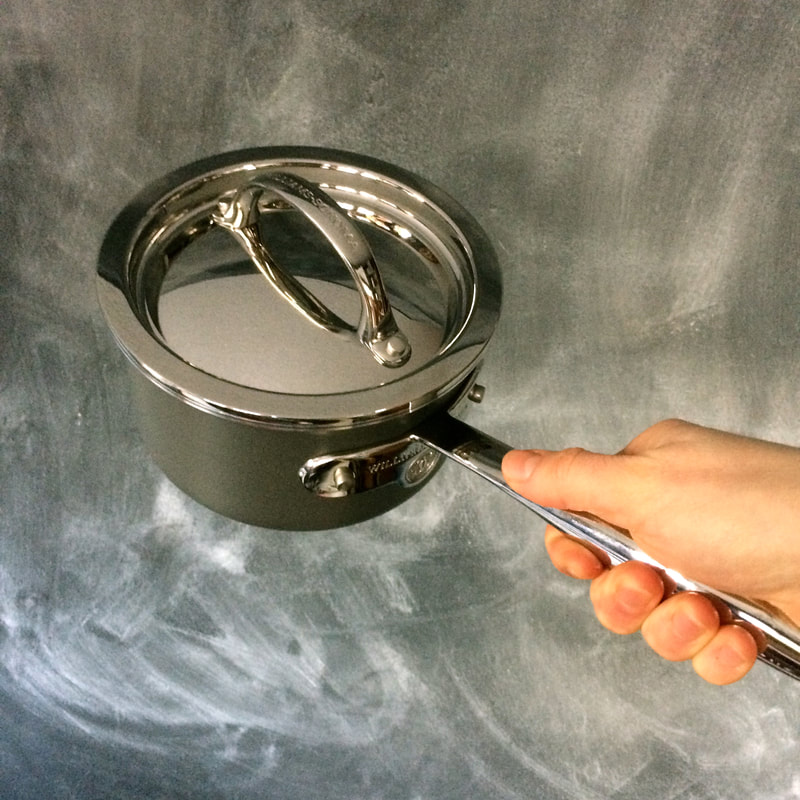 The best part of my evening however, happened when my chef came over to me at the very end. He quietly asked me, "Larissa, may I take three of your cupcakes home to share with my little ones?" (BEST COMPLIMENT I COULD HOPE FOR) "I would be honoured" I said, feeling like I had just won the ultimate prize. So, I may not have gotten top three, and I will not get the chance to share my product with the public next week at Chinook mall, and I definitely won't get to have my recipe published in a fancy newsletter. However I did get to do what I love to do best: sharing my passion and creativity via dessert to people who will appreciate it. Also, I'm just gonna publish the recipe myself here, for you, the brave reader. Cupcakes for all! Plus, a fancy brand new saucepan for me!! I wonder, what shall I cook in it first... 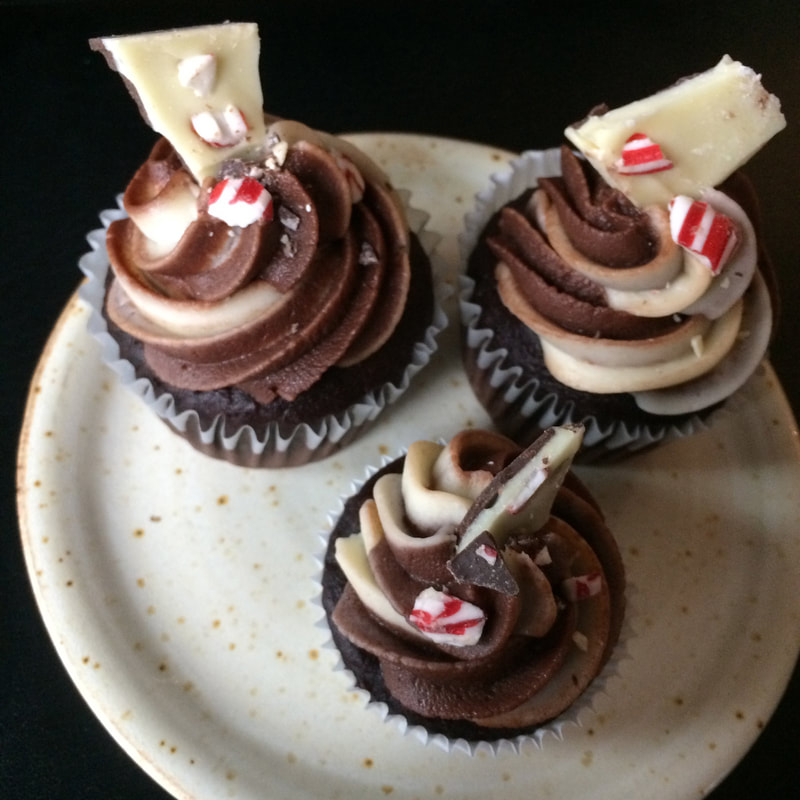 Peppermint Bark CupcakesCupcake recipe from Julie Van Rosendaal Cupcakes:
In a large bowl, whisk together the flour, brown sugar, cocoa powder, baking soda, baking powder, and salt. In a separate bowl whisk together the eggs, milk, oil, vanilla, and coffee. If the coffee is super hot, whisk it in carefully as to not scramble the eggs! Add the liquid ingredients to the dry, and mix just until combined, do not overmix or you will end up with tough cupcakes. Pour batter evenly into lined muffin tins, filling about 3/4 full. The batter will be VERY liquidy, don't fear! Bake until springy to the touch or until a toothpick inserted comes out clean: Standard cupcakes: 20-25 minutes. Mini cupcakes 12-15 minutes. Let cool for about 5-10 minutes in the pans before transferring the cupcakes onto a wire rack to cool completely. Frosting:
First make the peppermint ganache: chop the peppermint bark into small pieces and place in a heatproof bowl. Scald the cream, you ca either do this over the stove or watch it carefully in the microwave. Once it comes to a simmer turn off the heat, and pour the hot cream over the peppermint bark. Let sit for 3-5 minutes, then use a spatula to gently stir the mixture. Keep slowly stirring from the centre, working your way out, and you shall begin to see a homogenous mixture magically begin to form! Once the ganache is completely mixed together, use a mesh strainer to strain out the bits of candy cane that are floating around. Now you have a super smooth silky peppermint bark ganache. For the frosting: cream the butter and cream cheese until very smooth, no lumpies! Sift in the powdered sugar one cup at a time and mixing until totally smooth after each addition. Here you have your buttercream base which will also be the white frosting on your finished cupcake. Reserve some of the buttercream (about half) in a separate bowl to be the white frosting. To the remaining buttercream in the mixer bowl, add about 1/2-3/4 cup of the peppermint bark ganache. If you add too much, you will run the risk of the frosting splitting, so be cautious. Also to the bowl, add about 1/4 cup of cocoa powder. These measurements are meant to be to taste and preference so they are not exact. Be sure to taste the frosting as you go along and make adjustments where you see fit. Mix until you have a smooth chocolatey frosting, scraping down the sides of the bowl as needed. Assembly! Fit a large piping bag with a start tip. To get the "swirly" effect with the two tones of frosting, fill half (one side, from bottom to top) of the bag with the white frosting, and the other half/side with the chocolate frosting. The goal is to randomly get the two colours into the same bag without completely mixing the colours together; this will create that marbled, or swirled effect. Fairly simple to do, but very impressive looking! Pipe a spiral of frosting on top of each cupcake, top with a shard of peppermint bark, and a few pieces of the candy cane chunks. et, voila! Tis the season for Chocolate peppermint!!! 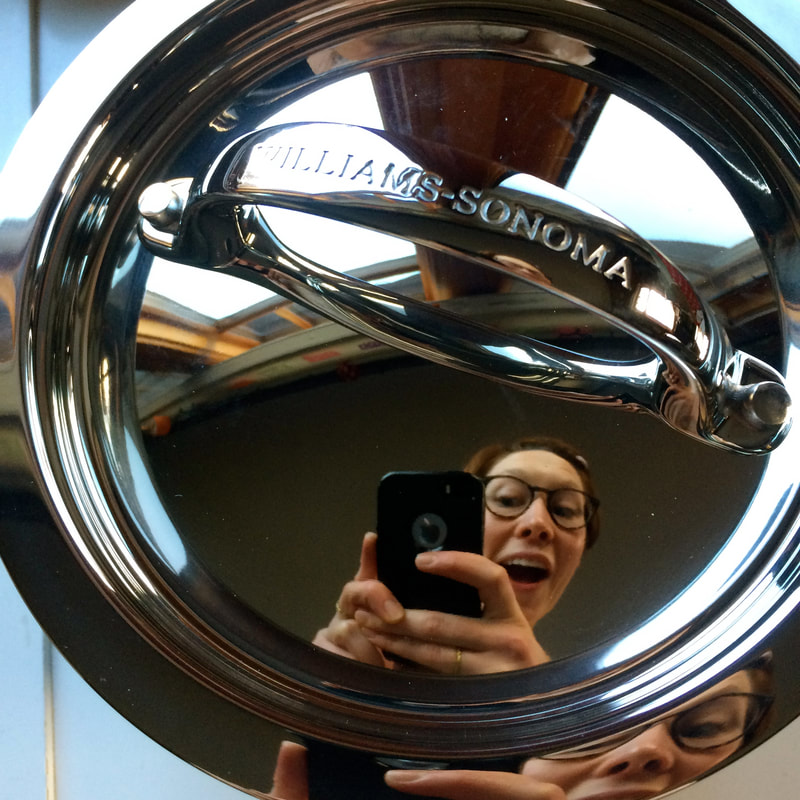 All words, photos, and opinions in this article are my own. I was not paid by Williams Sonoma for this post, I just really like them and had a lot of fun participating in the competition. Thanks for reading!
Last Christmas, my dear mother gifted me a set of mini tart tins with removable bottoms, an item on my baking wish-list!! I'm embarrased to say that it's taken me over six months to finally take them for a test drive... but better late than never! Their first use features a basic sweet-dough tart shell and one of my personal favourite fillings... pecan pie! These are somewhere in between personal sized pecan pies, or giant pecan tarts... call them what you will. But we can all call them DELICIOUS. 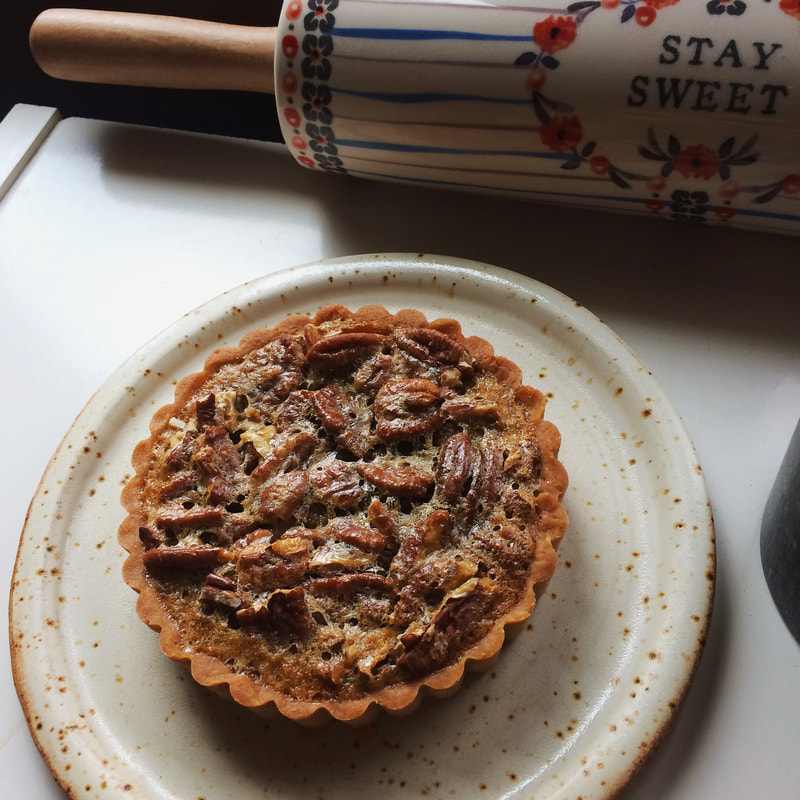 Pecan TartsRecipe adapted from my experience at The Butchart Gardens Tart Shells:
About 20-30 minutes before you want to use it, take the dough out of the fridge to thaw a little bit so that it's easier to roll. On a lightly floured surface, roll the dough out to 1/8-1/4 inch thick. Place a tart tin on the dough and use a paring knife to cut a circle of dough out that is just slightly larger than the tart tin. Place the circle of dough into the tart tin and press into the bottoms and up the sides, pressing well into the edges to form a neat wall that won't slump while baking. Dock the bottom of the tart with a fork. Repeat with remaining tins. Place the tins in the fridge or freezer and chill until firm, about 30 minutes. Preheat the oven to 375. Place a piece of parchment into the dough shells and fill with dried baking beans or pie weights to blind bake the tart shells. Bake for about 15 minutes until just starting to turn golden around the edges. Reduce the oven temperature to 350. Remove the beans and parchment. Return the shells to the oven and continue baking until lightly golden and baked through, don't worry too much as these tarts will be going back into the oven later. Let them cool before adding the pecans and filling... Pecan Tart Filling:
Preheat oven to 350F. Place the pre-baked tart shells onto a rimmed baking sheet. Fill the tart shells with toasted pecans, not too many, but just enough to cover the bottom of the shell and allow for a pecan piece in every bite. Pour the filling over the pecans to fill the tart shells. Bake for about 25 minutes until the filling has slightly souffléd and does not jiggle too much when you shake the pan. Let cool completely before enjoying :) I am happy to have another addition to my muffin repertoire. I absolutely love the flavour of cornmeal in both sweet or savoury adaptations... this particular quick-bread is more on the sweet side, making it a lovely breakfast option. You can add anything you like to the batter to mix things up... in the photo below I added local saskatoon berries and fresh thyme from my backyard which gives the muffins a splendid scent. Cheddar cheese and chives add savoury notes, which makes for a nice lunch alongside a soup or salad. Any kind of frozen berries, chopped fruit, sundried tomatoes, cheese, olives etc would also be welcome additions. Use your creativity/imagination/pantry! 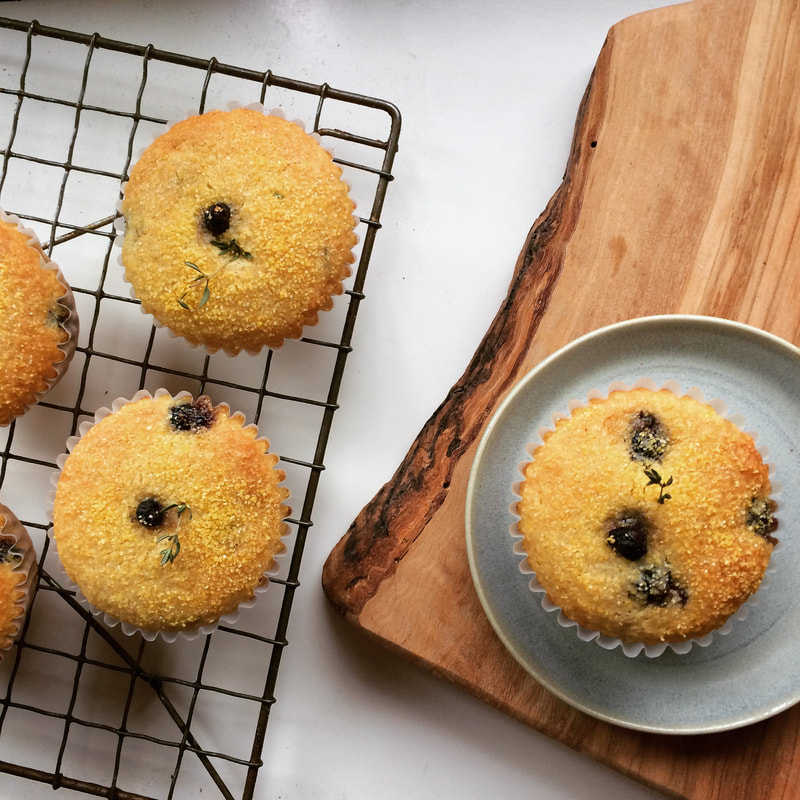 Cornmeal MuffinsRecipe adapted from my experience at The Butchart Gardens I like to measure by weight, however I have tried to also give cup measurements on the side. I cannot guarantee their accuracy, but it would be my best approximation!
In a separate bowl, whisk together the sugar, vegetable oil, eggs, buttermilk and vanilla. Mix the wet ingredients into the dry ingredients until just combined. If desired, add any fruit, herbs, cheese etc to the batter and fold in gently, being careful not to over-mix. Scoop into lined muffin tins and bake at 350 (325 convection) for about 20 minutes depending on the size of your muffin tins, until just lightly golden around the edges and the tops spring back when pressed with your finger. Let cool slightly, serve warm or at room temperature. |
Tiny Tea PartyIt's about celebrating the tiny things. Categories
All
© 2015 Larissa Costella
All Rights Reserved (All images and content are my own unless otherwise noted) |
 RSS Feed
